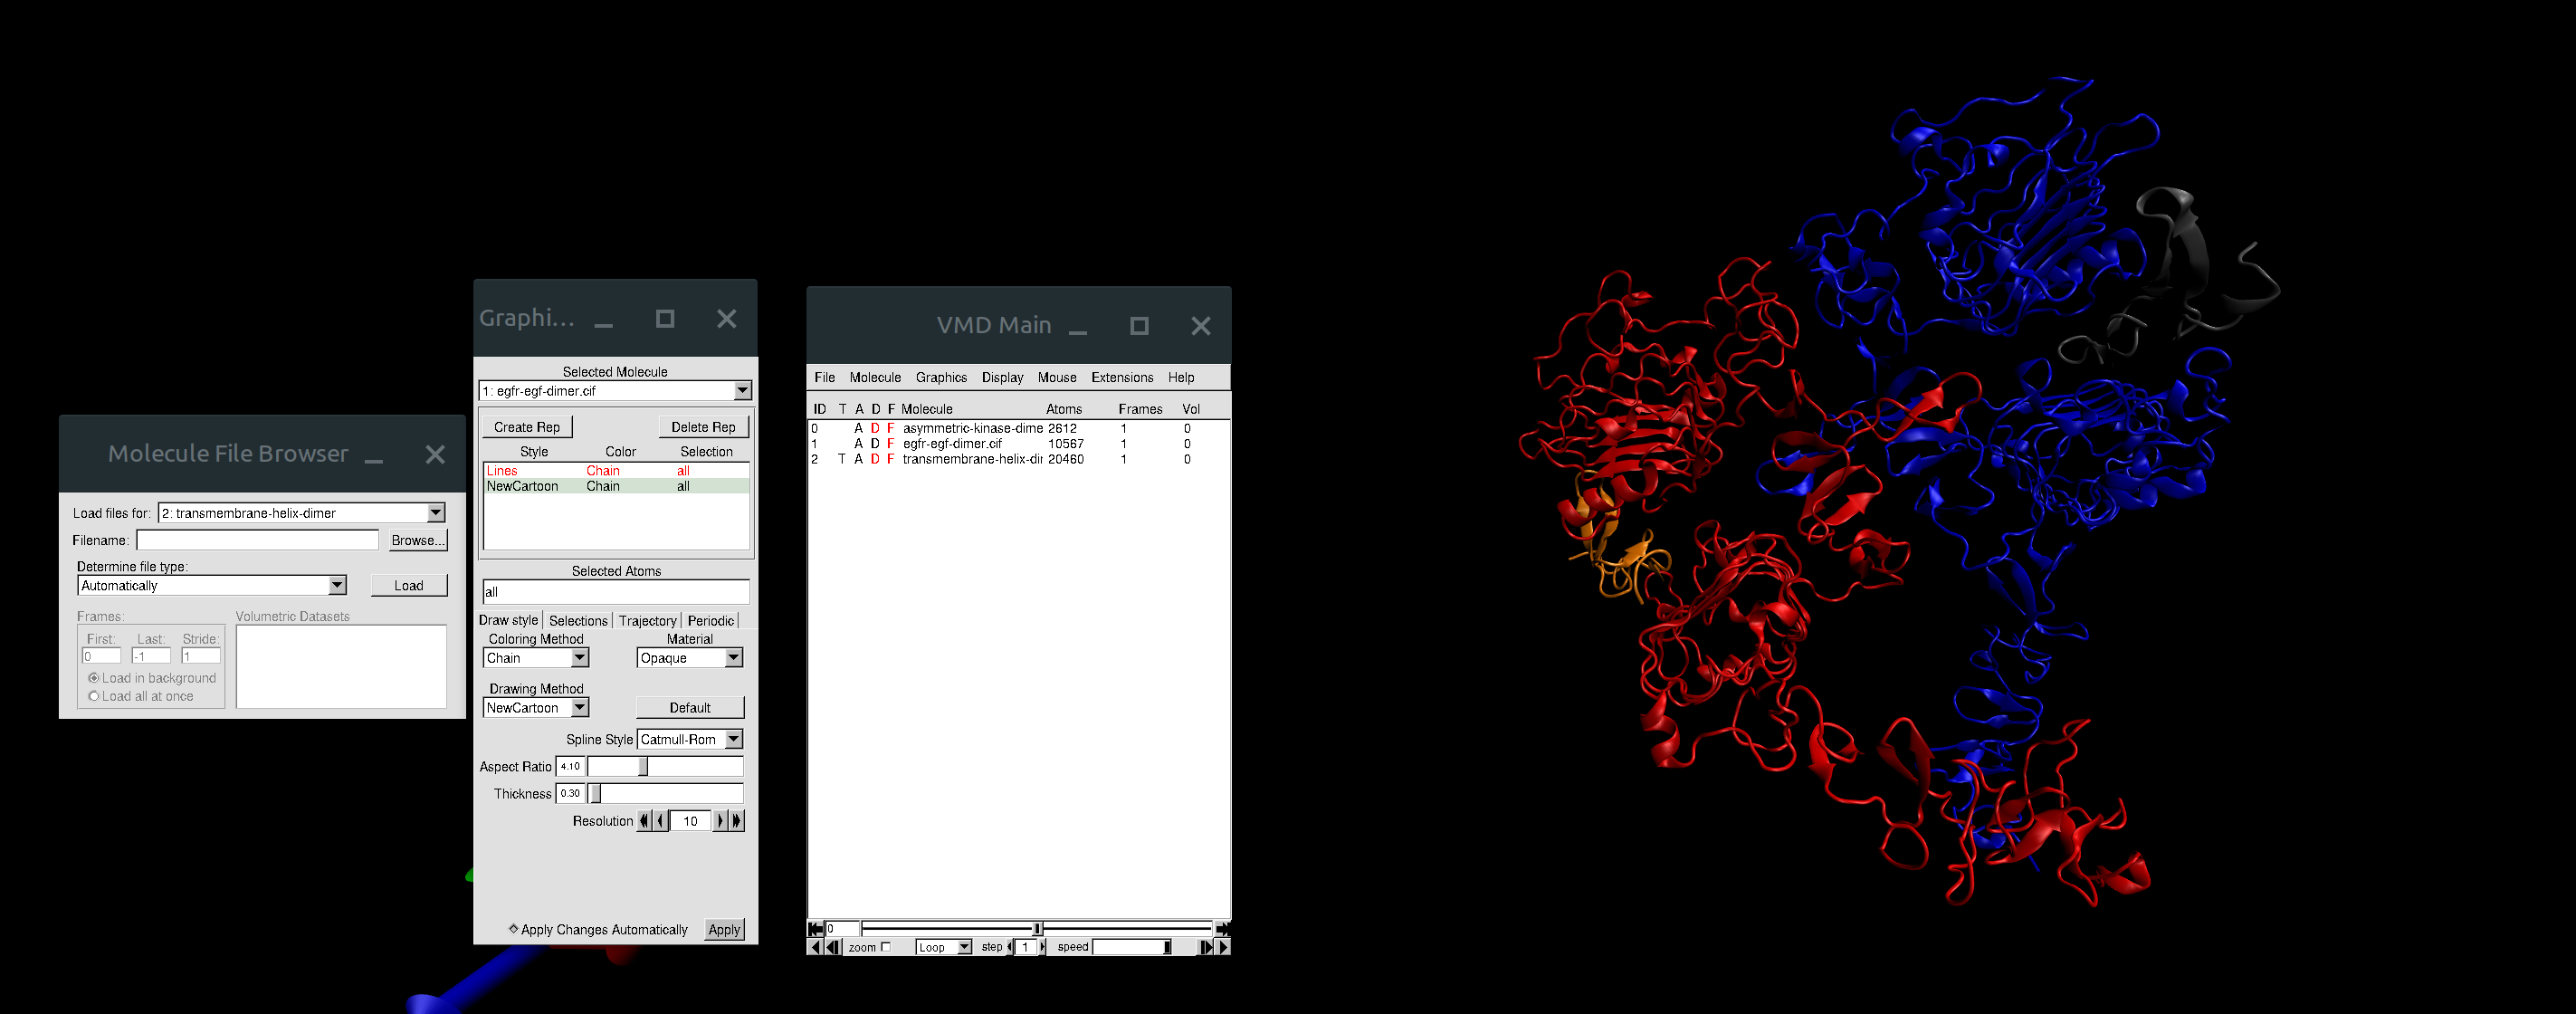
PDB IDs, Huang’s Paper
-
PDB ID 3NJP: Dimeric extracellular module of EGFR bound to EGF.
-
PDB ID 2M20: Transmembrane helix dimer of EGFR.
-
PDB ID 2GS6: Asymmetric dimer of EGFR kinase domains.
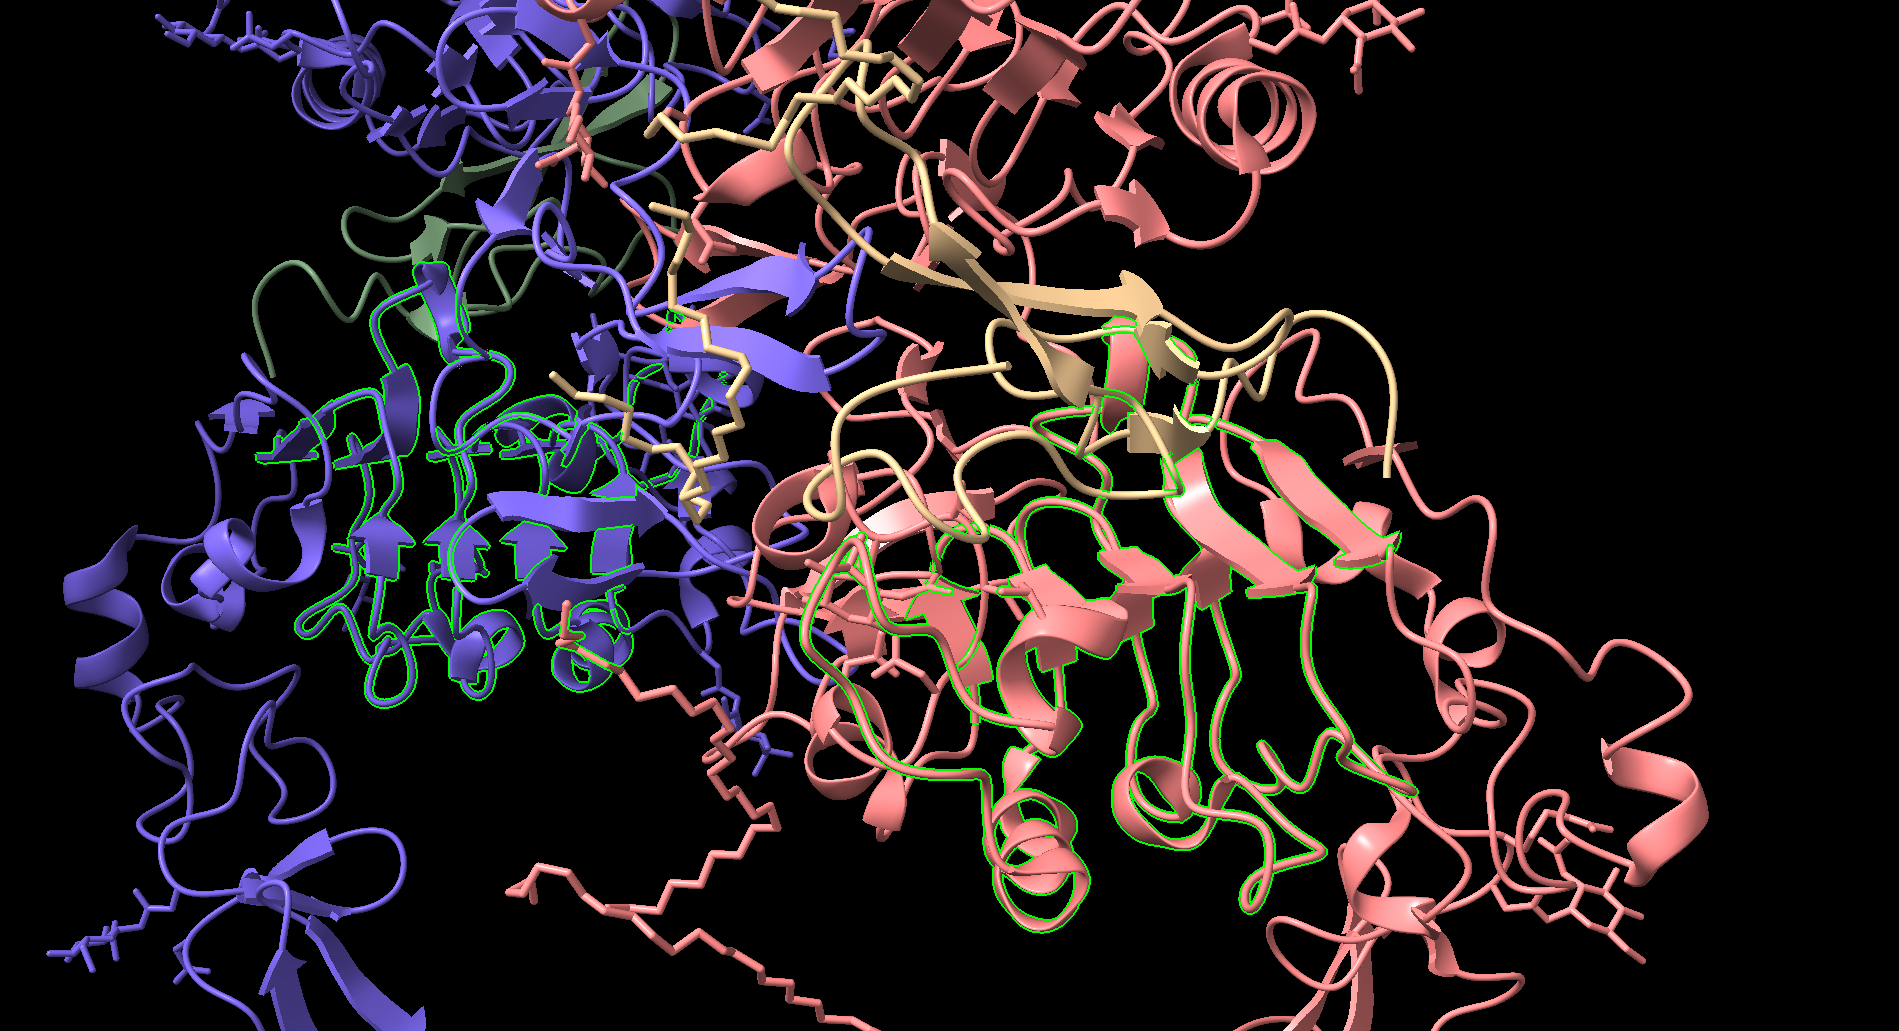
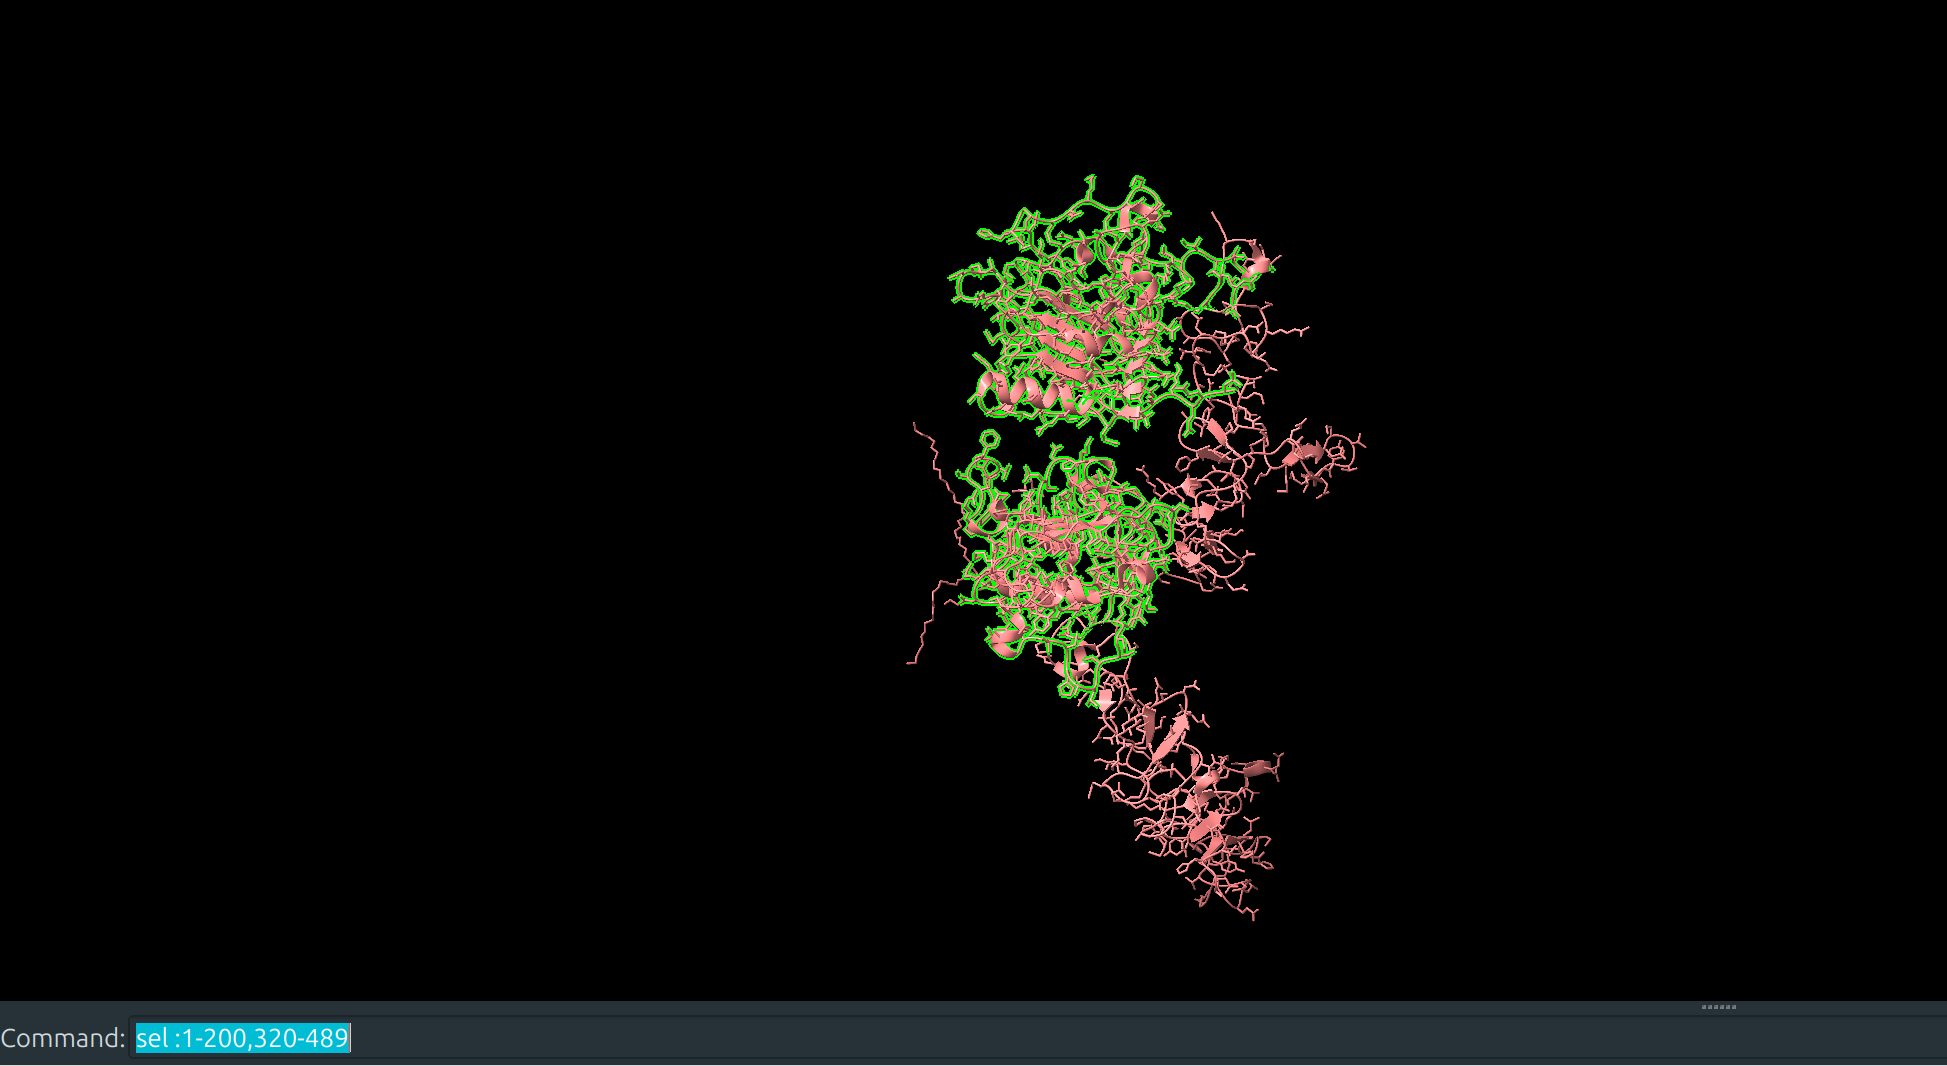
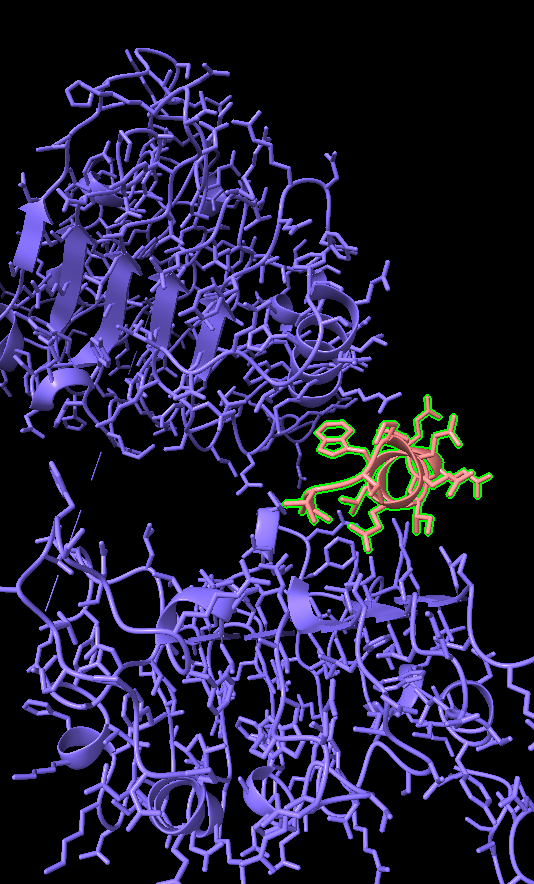
Extracellular Untethered Domain with EFG Bindings
- EFG peptides shown in Yellow and Black
- Two arms of EGFR tied together through a beta hairpin shown in the intersection of the red and blue segments (same protein)
EGFR has three main domains: the extracellular binding module, the transmembrane helix module, and the intracellular kinase modules. The extracellular binding domain is large and contains two binding sites for EGF or another large ligand. Typically, domain III of the extracellular module is tethered to domain IV. Geometrically, what this looks like is the large lobes of the extracellular module are lying against the lipid bilayer surface of the cell. This forces the transmembrane helices into an entropically disordered state and thereby the kinase domains into a disordered state. Upon binding by two EFG ligands on either side, the tether between domain III and domain IV is broken, allowing the extracellular domain to “sit up straight”. This allows the transmembrane helices to “criss-cross” and allows the kinase domains to dimerize, signaling a pathway for cell reproduction. In cancer cells, EFGR may be overexpressed or mutated so that they remain stuck in the EGF bound state at all times. Therefore, being able to target cells with mutated or overexpressed EGFR proteins is an enticing route for cancer therapeutics.
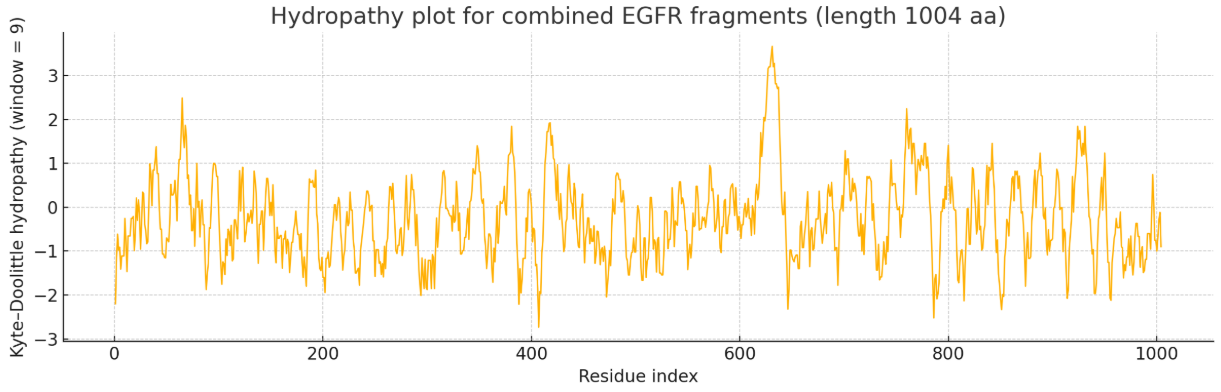
Hydropathy Plot of the Combined Three PDB Files
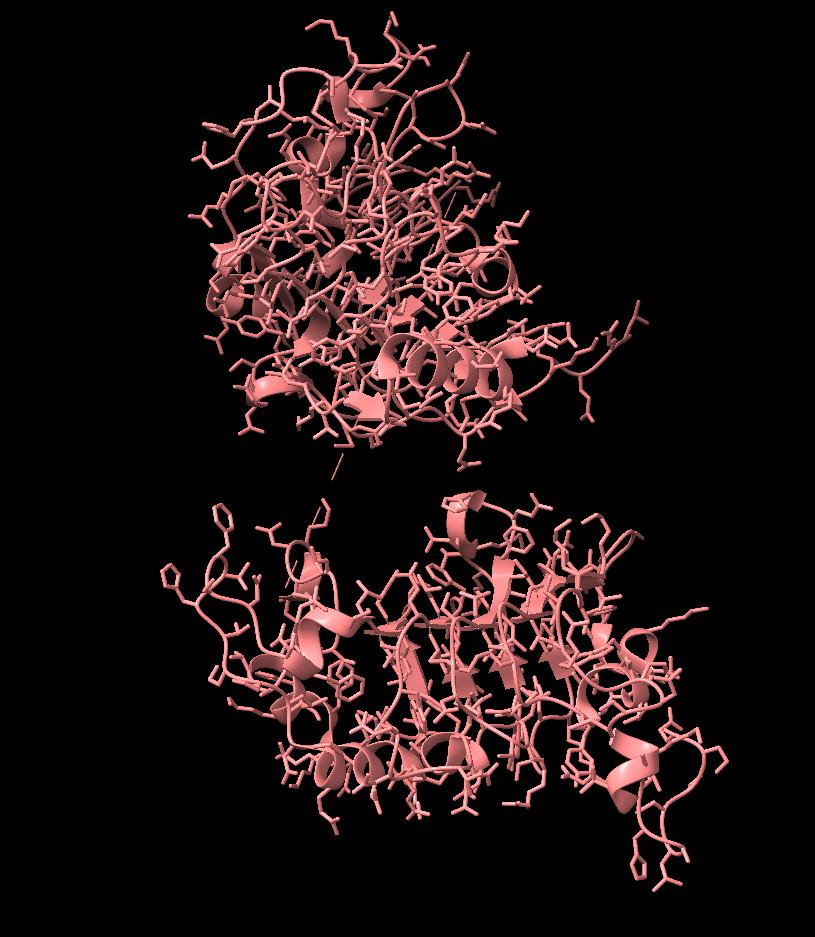
Residues 340-440, the Binding site for Domain III
- Visualized with ChimeraX
A reduced portion of chain B is exported
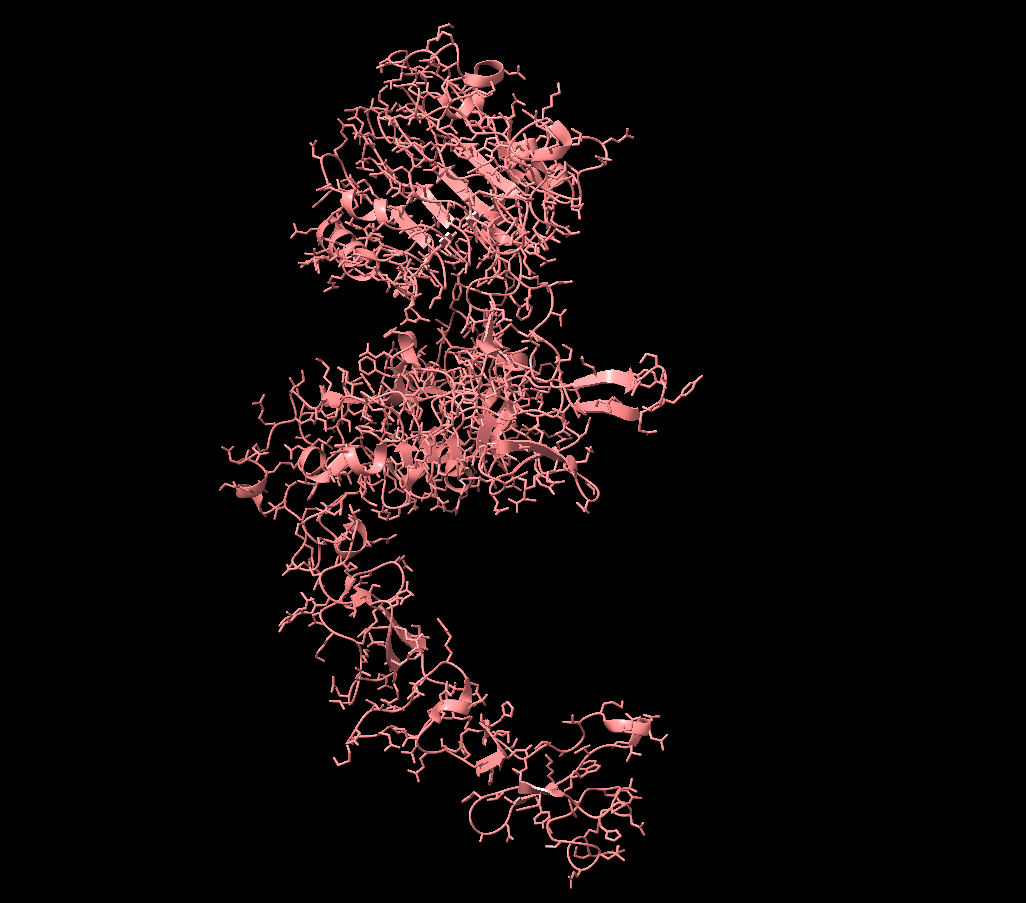
- This will be used to specify the binding sites.
- Tip: reduce the number of residues in the exported .pdb as much as possible to reduce computation time. Ideally, I should have stripped away everything but the residues near the two beta sheet surfaces defining the binding site.
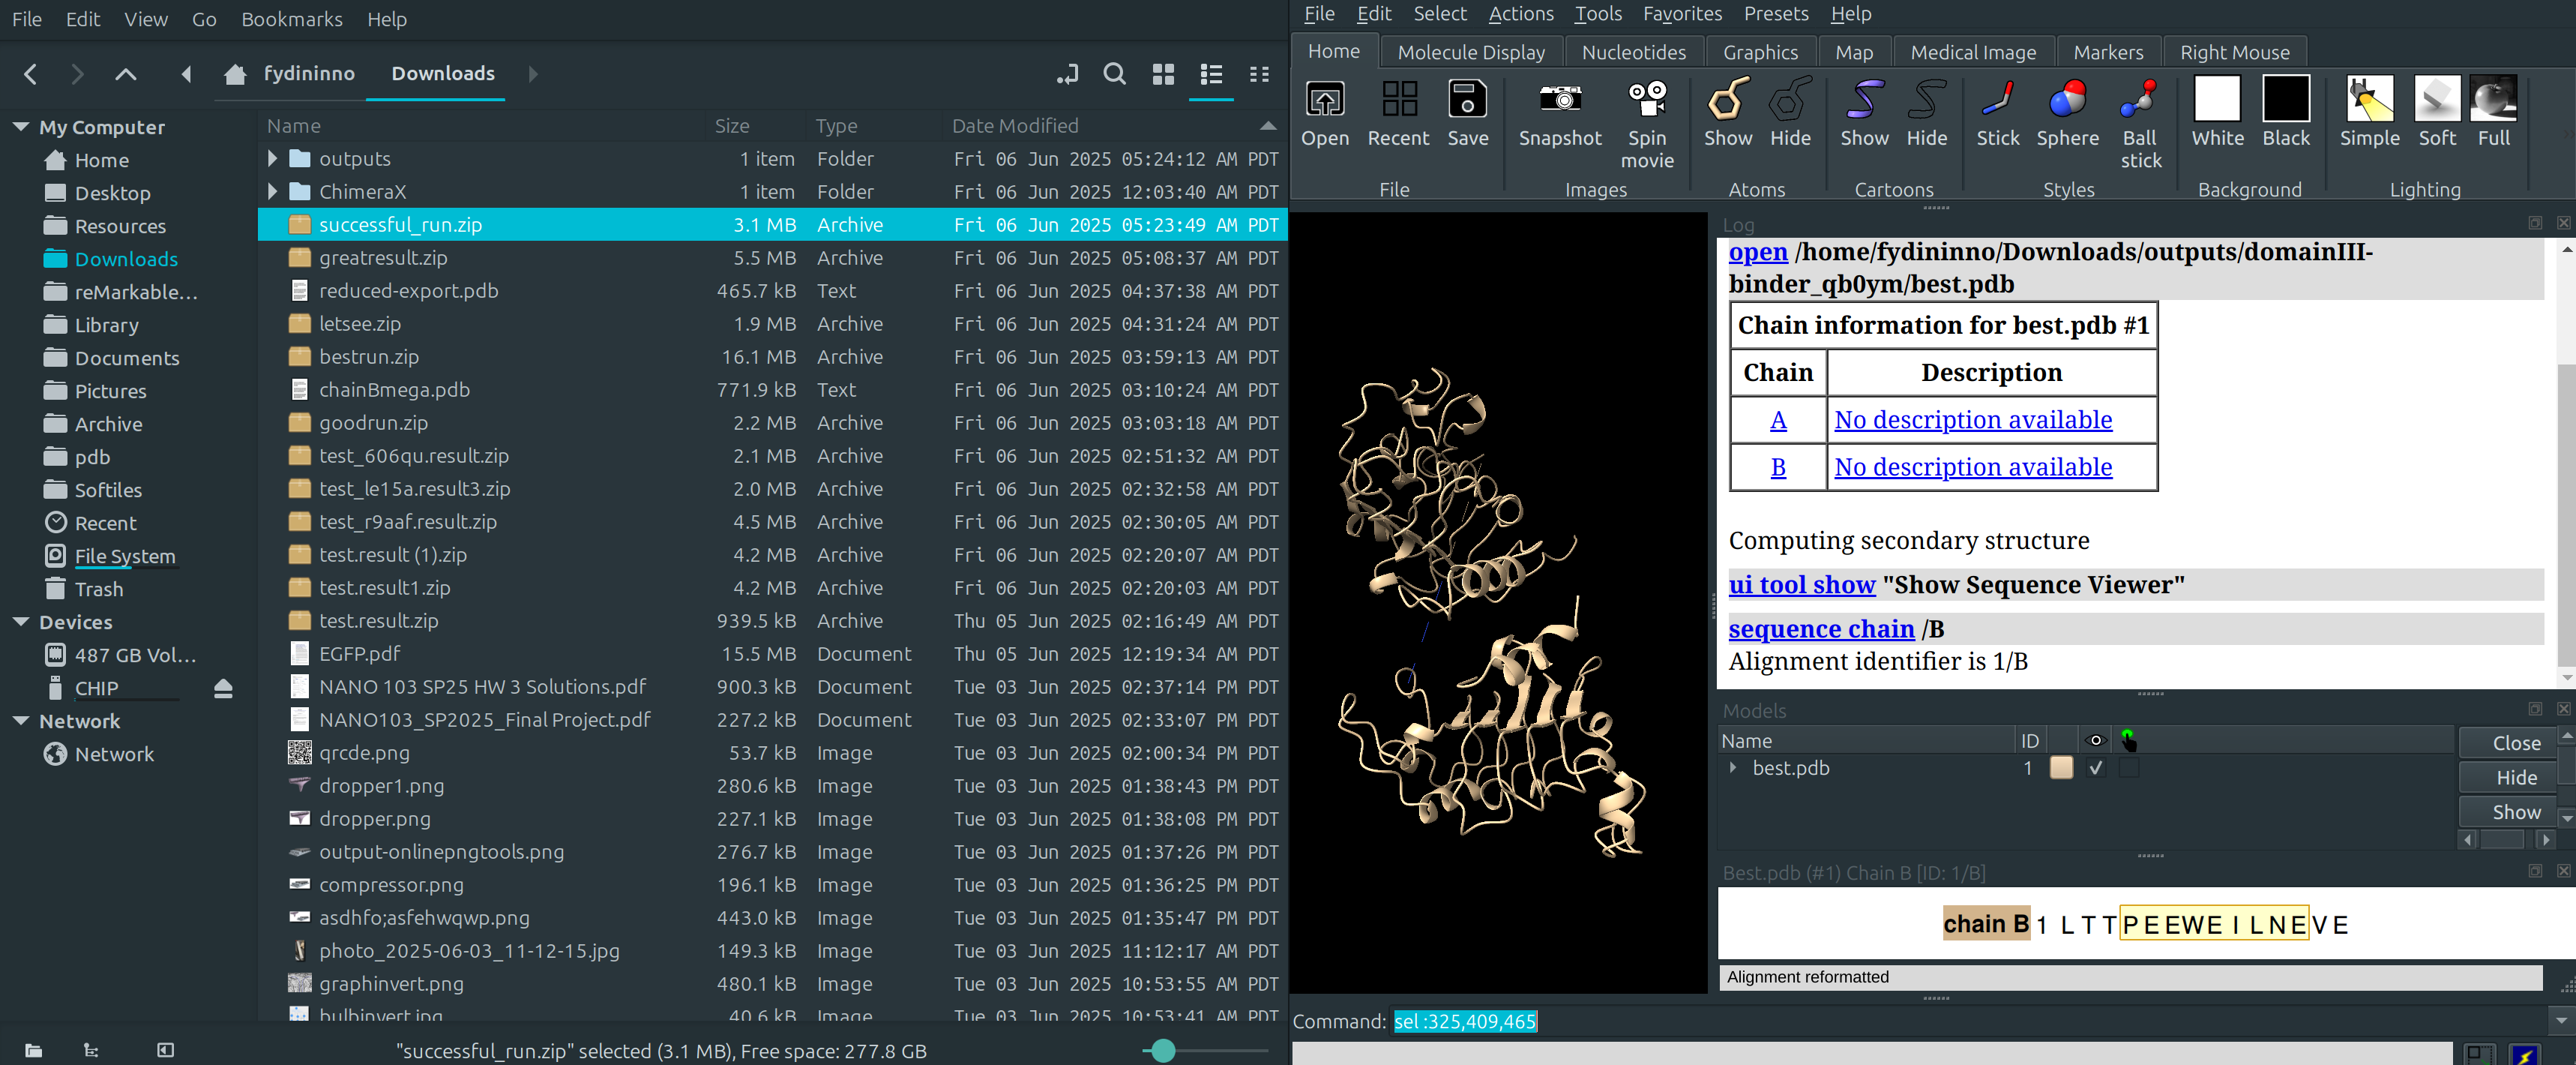
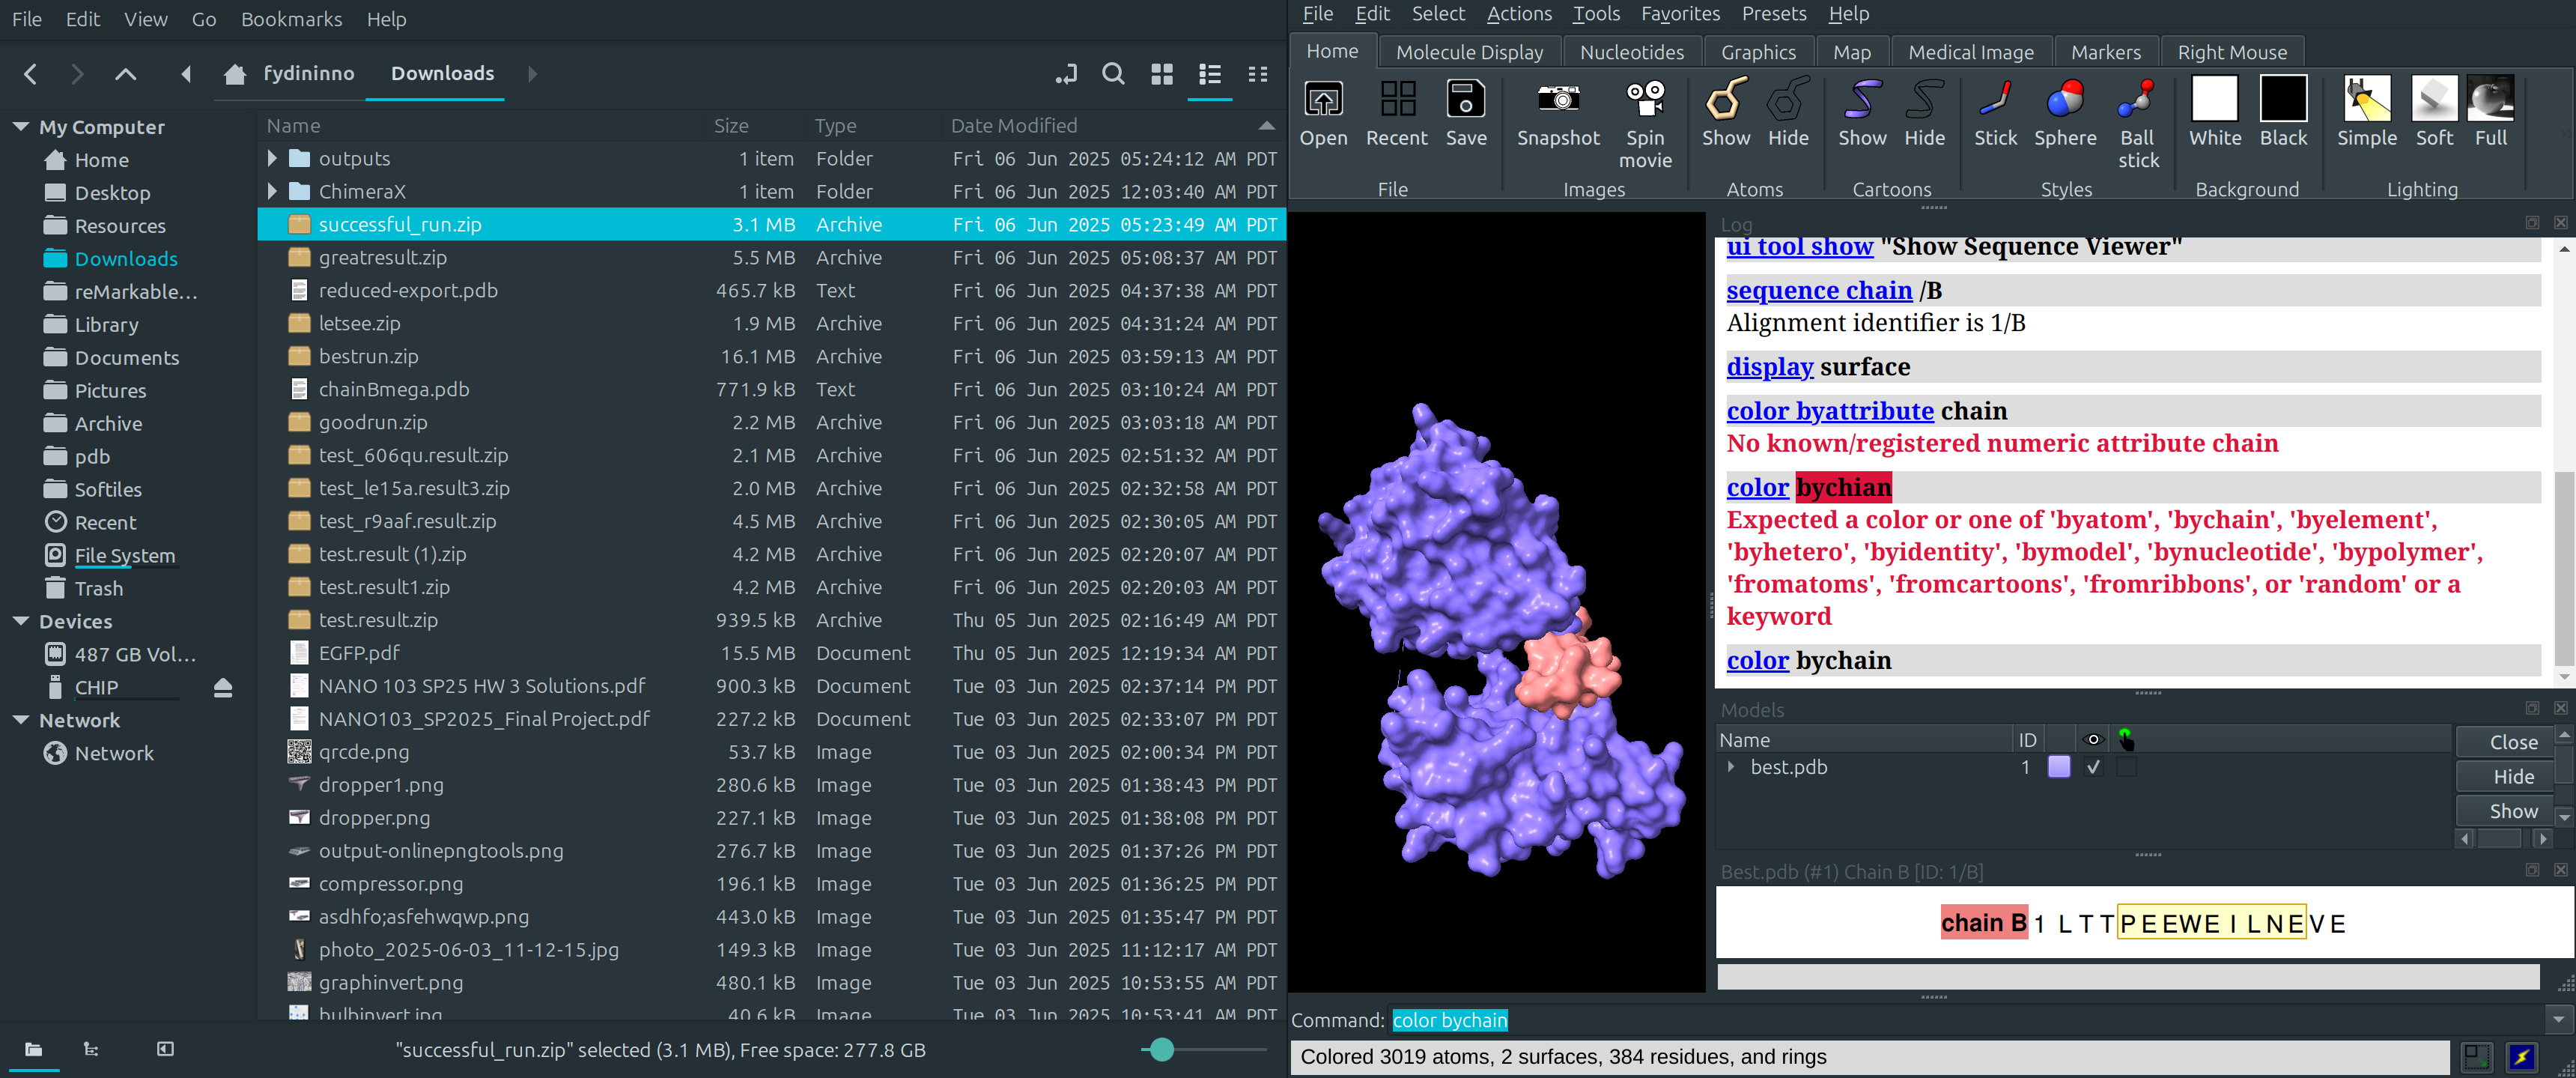
Identification of Binding Residues
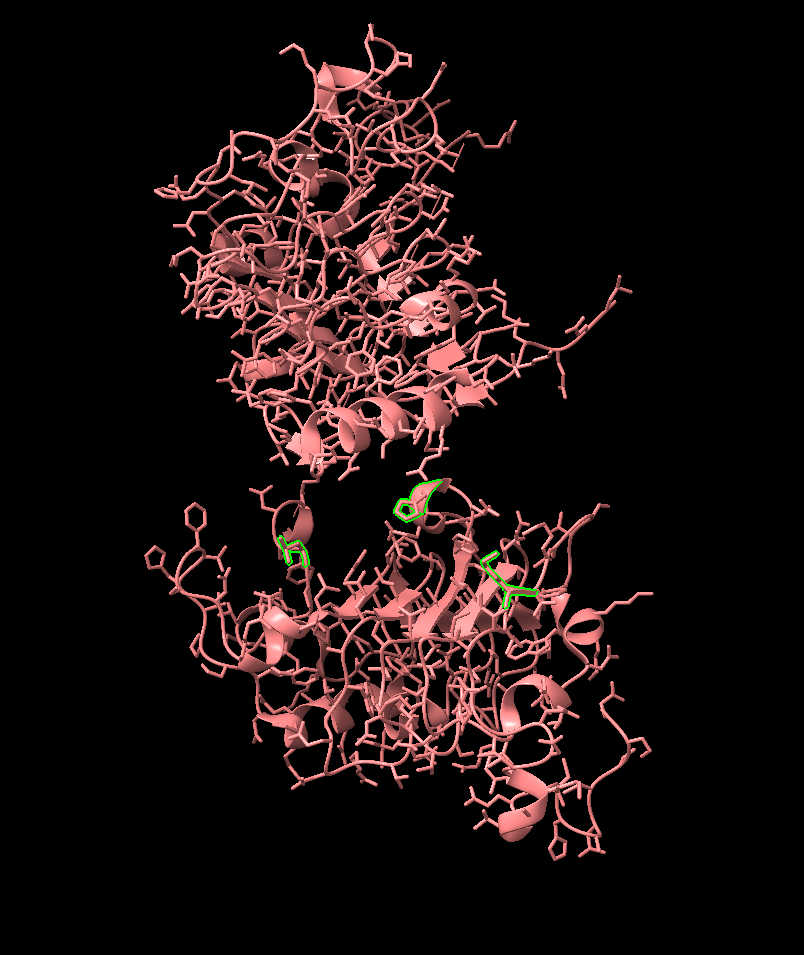
- sel :325,409,465,
- These will be the targeted residues, allowing us to “fence off” the binding area with a single ligand.
- Tip: try to choose exposed residues on the interior of the cavity. I avoided residue 357 (one sticking out on the left) because it expelled the generated binder to the outside of the cavity.
RFdiffusion Google Colab Folder Configuration
Link to RFdiffusion Google Colab: https://colab.research.google.com/github/sokrypton/ColabDesign/blob/v1.1.1/rf/examples/diffusion.ipynb#scrollTo=TuRUfQJZ4vkM
Uploading a file and copying its path
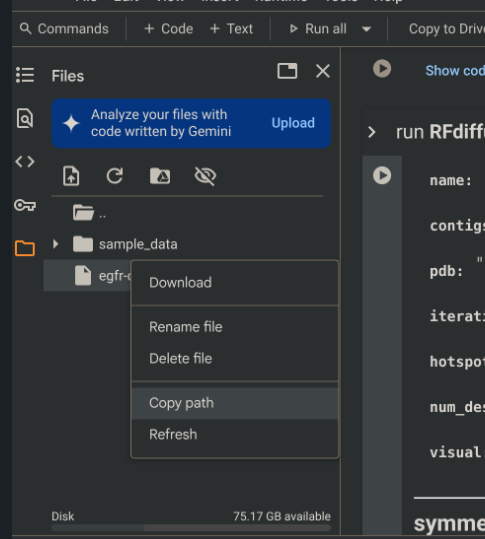
- This path will go into the “path” variable shown to the right.

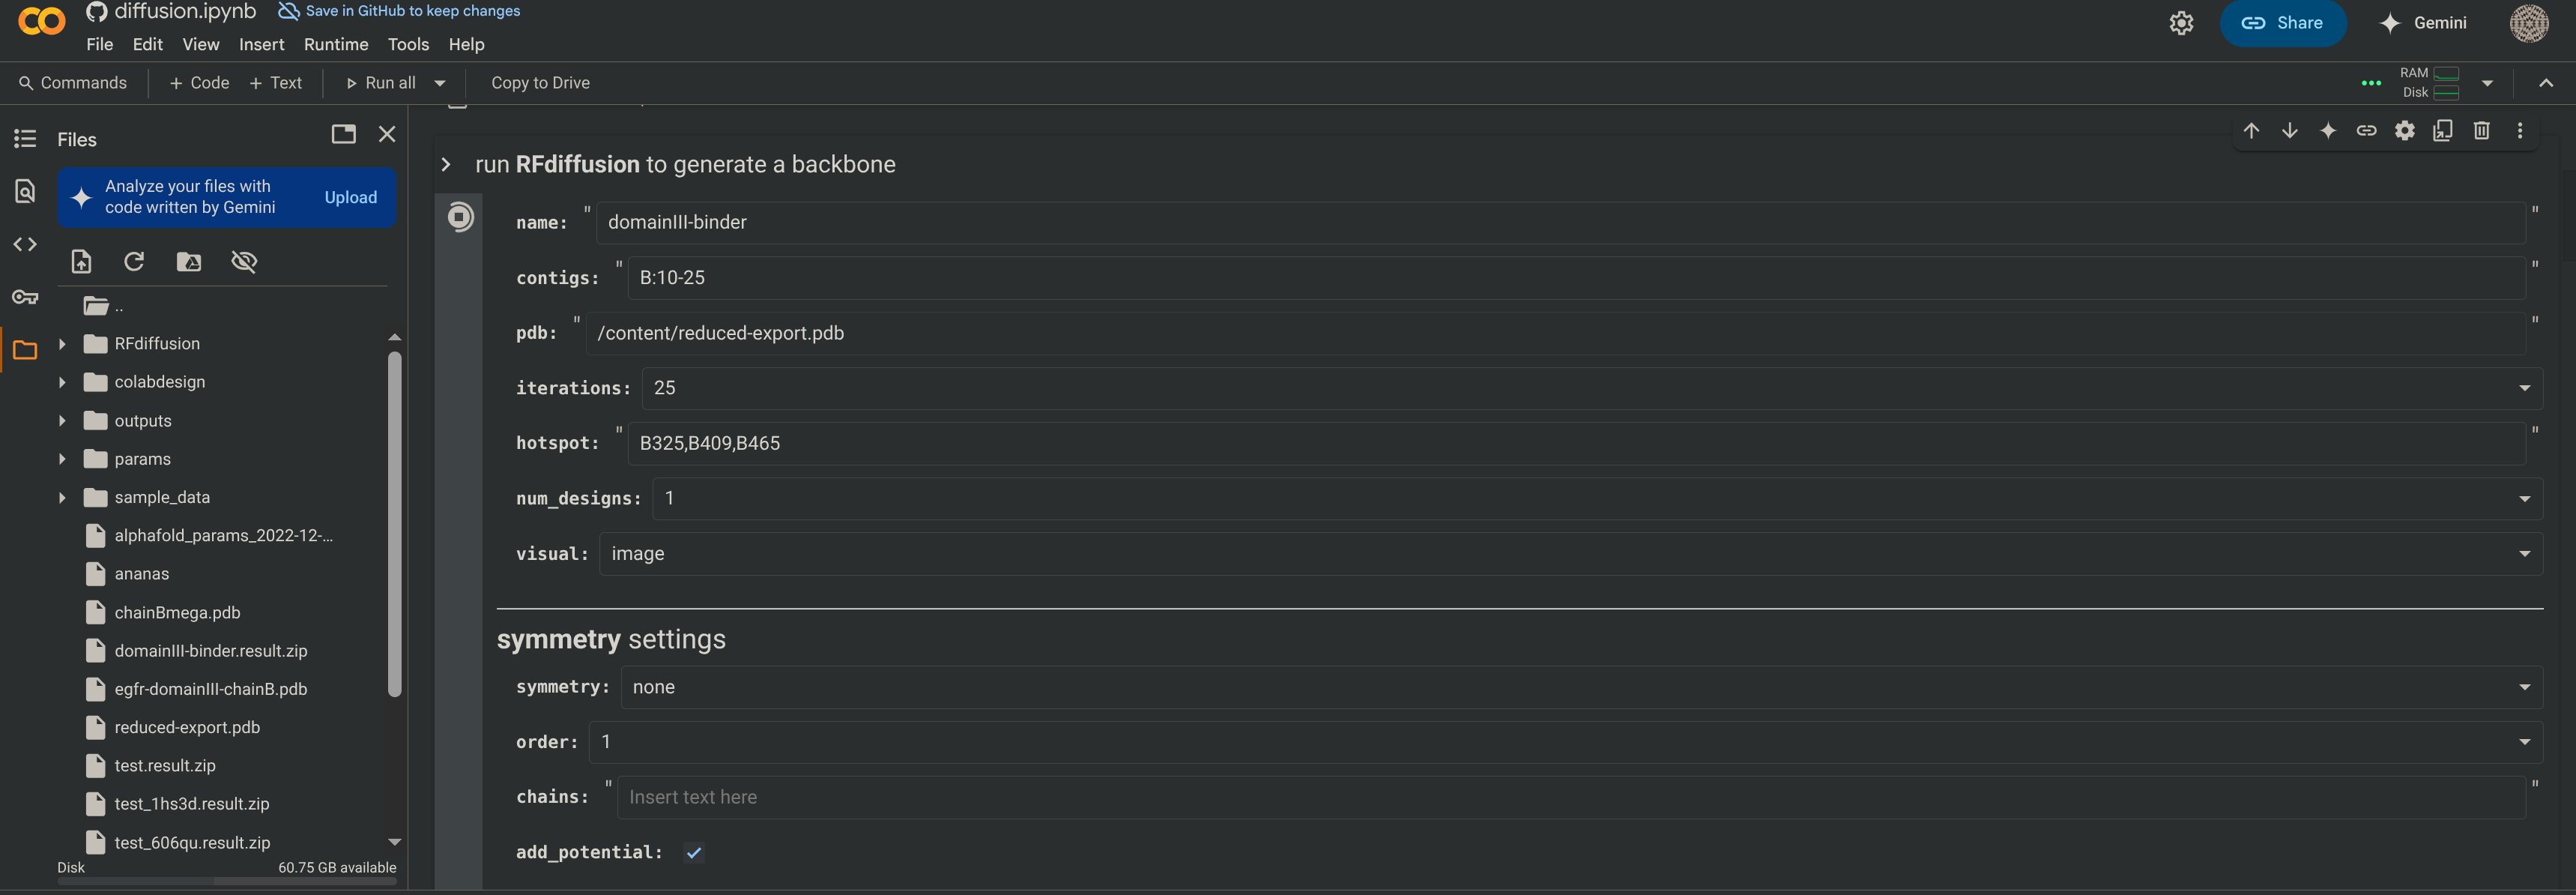
- Configurational Details:
namecan be anything.contigs='B:10-25'means that chain B is fixed and the resulting binder to be generated on it is 10 to 25 residues long- Iterations
25, the more iterations, the longer the simulation and the more accurate the output. /content/reduced-export.pdbThis is the path to be passed into the generation.hotspot=('B325,B409,B465')These are the residues to be targeted, they are part of the identified binding surface.- num_designs
1. Having multiple designs output allows you to see how well defined your constraints are. If you get similar results many time, then your constraints are very well defined, and there seems to only be one solution to your problem. This may or may not be a good thing depending on how much variability you want. - Turn
initial guesson andnum_recycles=3for binder designs. symmetrymakes a copy of your original chain in a point symmetry around the origin’s z-axis to design perfectly symmetric multimers. When using this feature, turn onuse_multimerin the ProteinMPNN section to ensure that the sequence guesser treats the generated protein as a multi-chain unit.- Avoid using spaces. If you get errors, look for silly syntax mistakes or unnecessary inclusions in your input like quotation marks or parentheses. Don’t worry about the extra folder you see to the left. They will show up after you press “Run All”.
- Click ‘Run All’
See Results A .zip file will be automatically downloaded with all the pdb files.
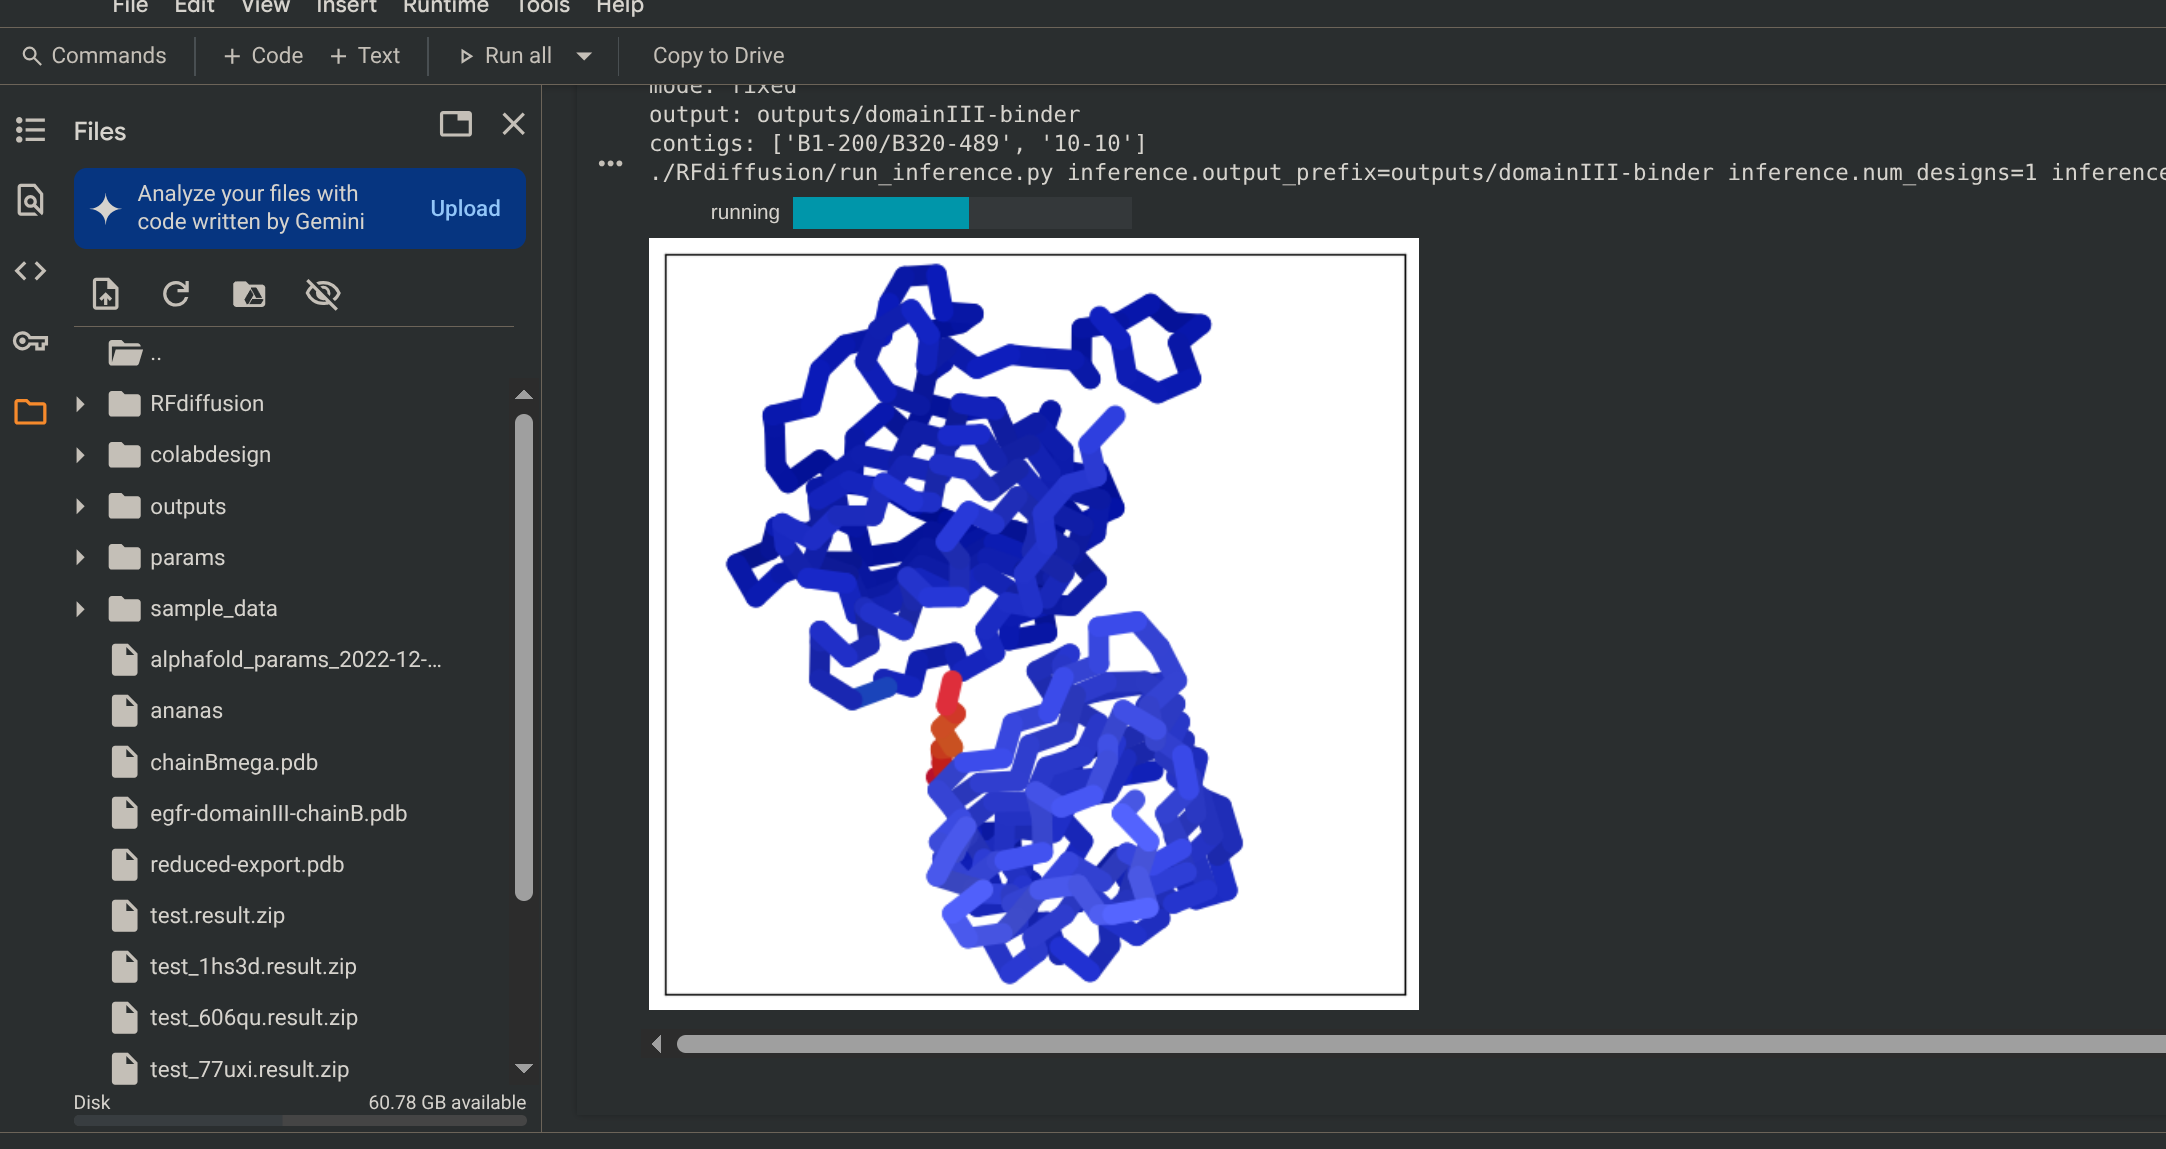
- If you cancel the run before all the tests finish, then you will not get the ProteinNPM final pdb, meaning that you cannot see the residue IDs of your protein.
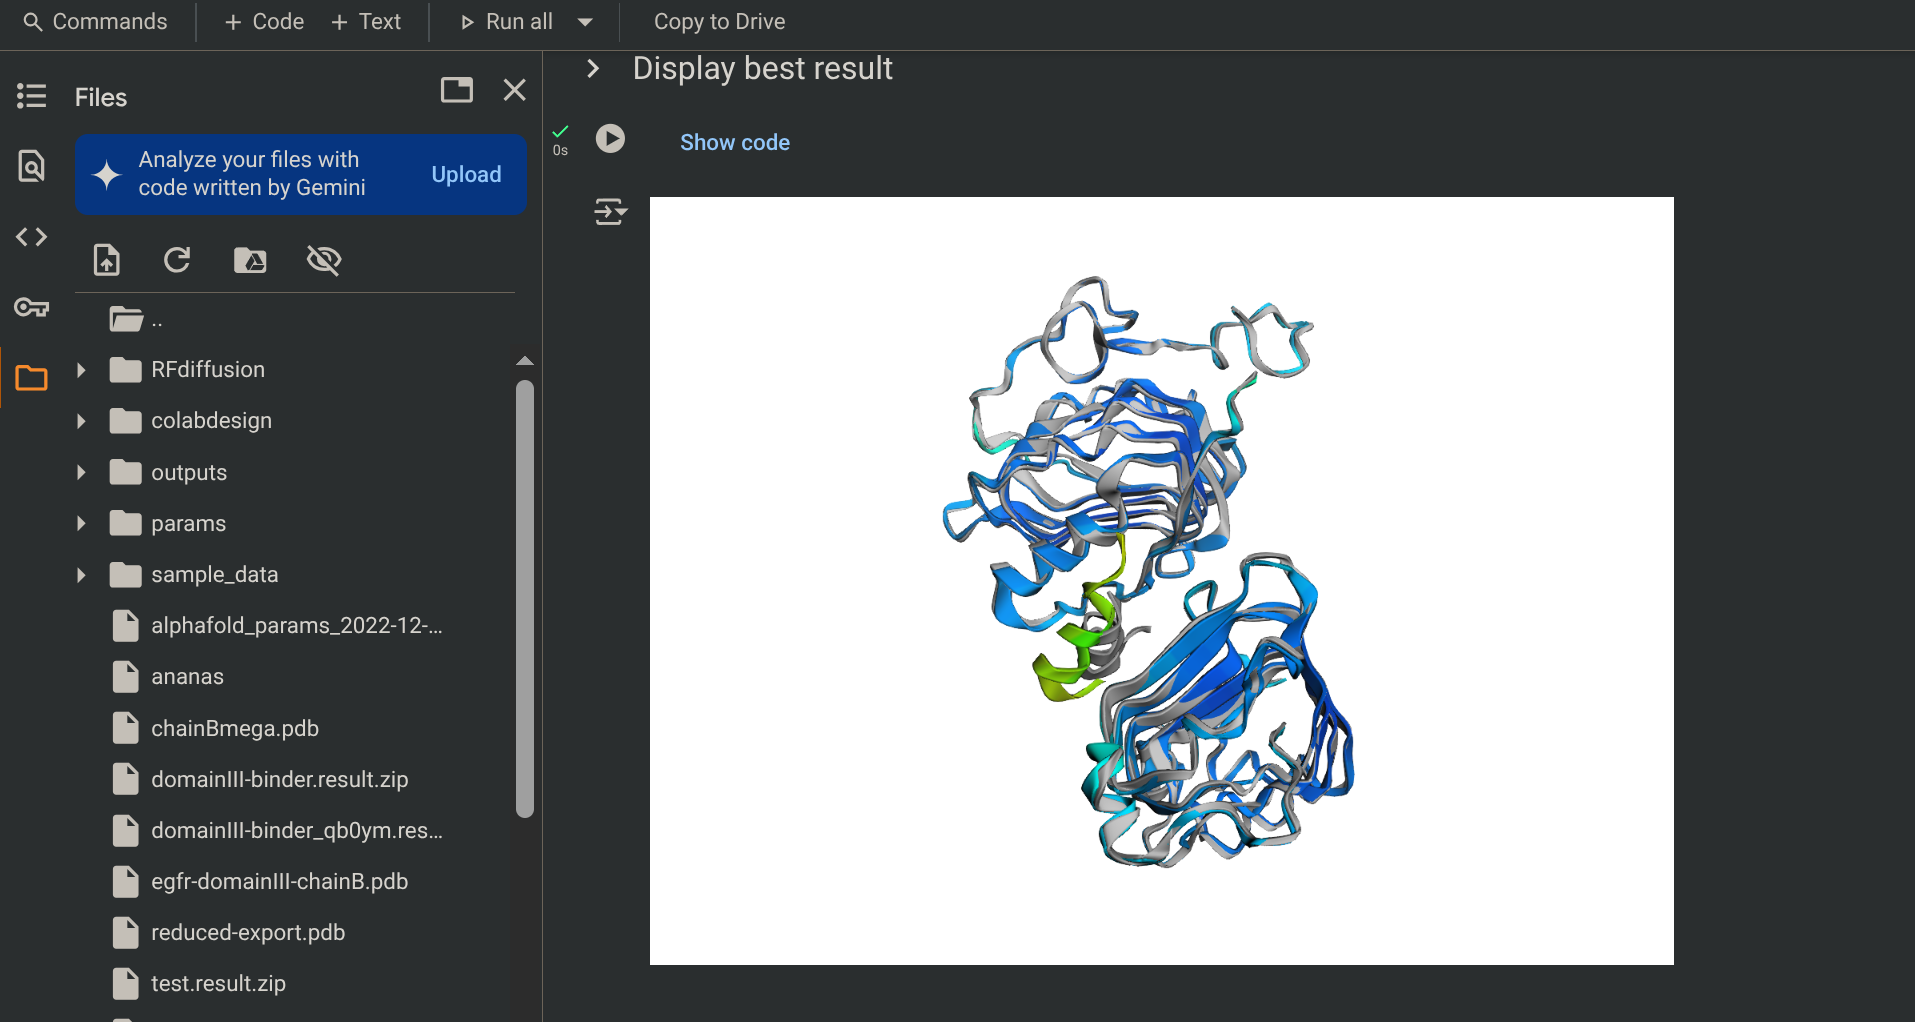
- RFdiffusion (colored), Alphafold 2 (grey)
Extracting a Sequence
Sequence:
LTTPEEWEILNEVE
Reverse Translation:
CTG ACC ACC CCC GAG GAG TGG GAG ATC CTG AAC GAG GTG GAG
Add a Promoter and RBS to the front and then a terminator to the back:
Prepend: TGTGAGCGGATAACAATT (lac promotor) and then AGGAGG (RBS ecoli)
Append: CCCCCCTAGGCCATAGGCCACTTTGCCTTTCTCTCCCTATCGGATTCTTGTATTGTC (terminator)
Final Gene:
TGTGAGCGGATAACAATT AGGAGG CTG ACC ACC CCC GAG GAG TGG GAG ATC CTG AAC GAG GTG GAG CCCCCCTAGGCCATAGGCCACTTTGCCTTTCTCTCCCTATCGGATTCTTGTATTGTC
Primer and Plasmid Design Using Benchling Go to Benchling.com → Sign Up → Sign up with your UCSD address → Create a New Project → Give it a name Inside the project, click the button and create a new DNA sequence. Paste the gene in.

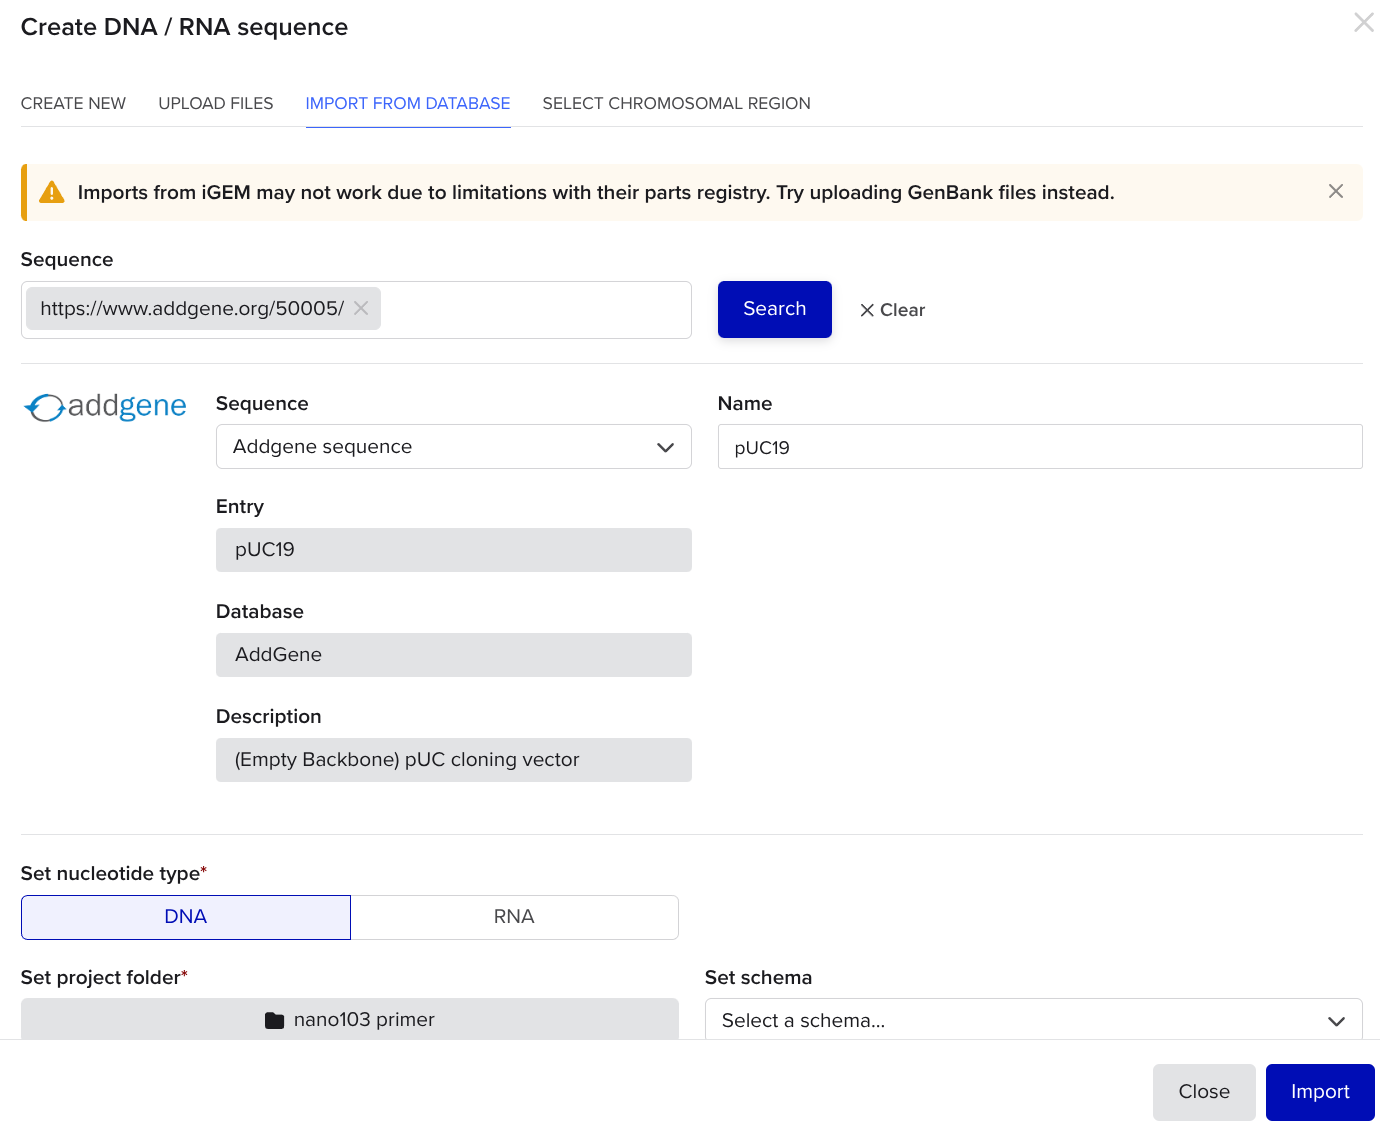
In the project, click the button again. This time, click new DNA sequence and use the import from database tab:
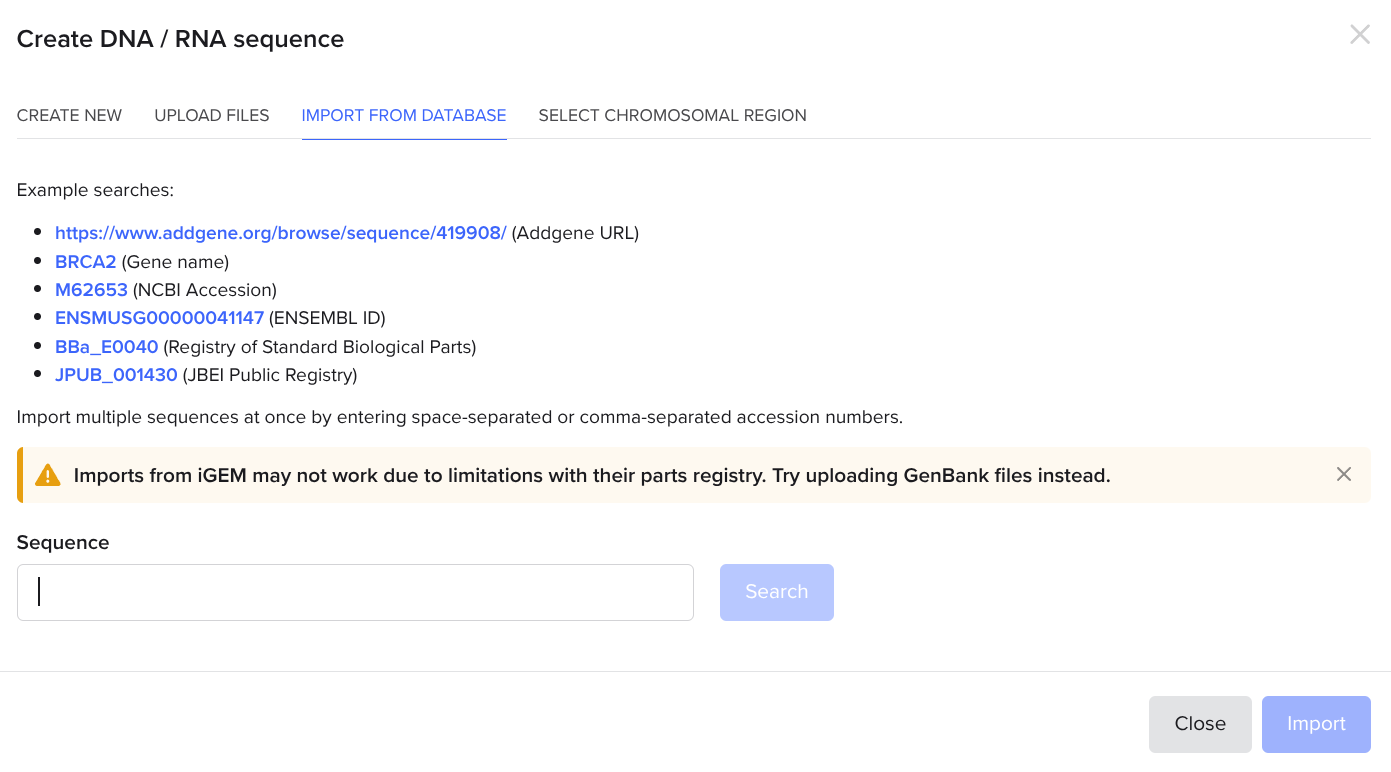
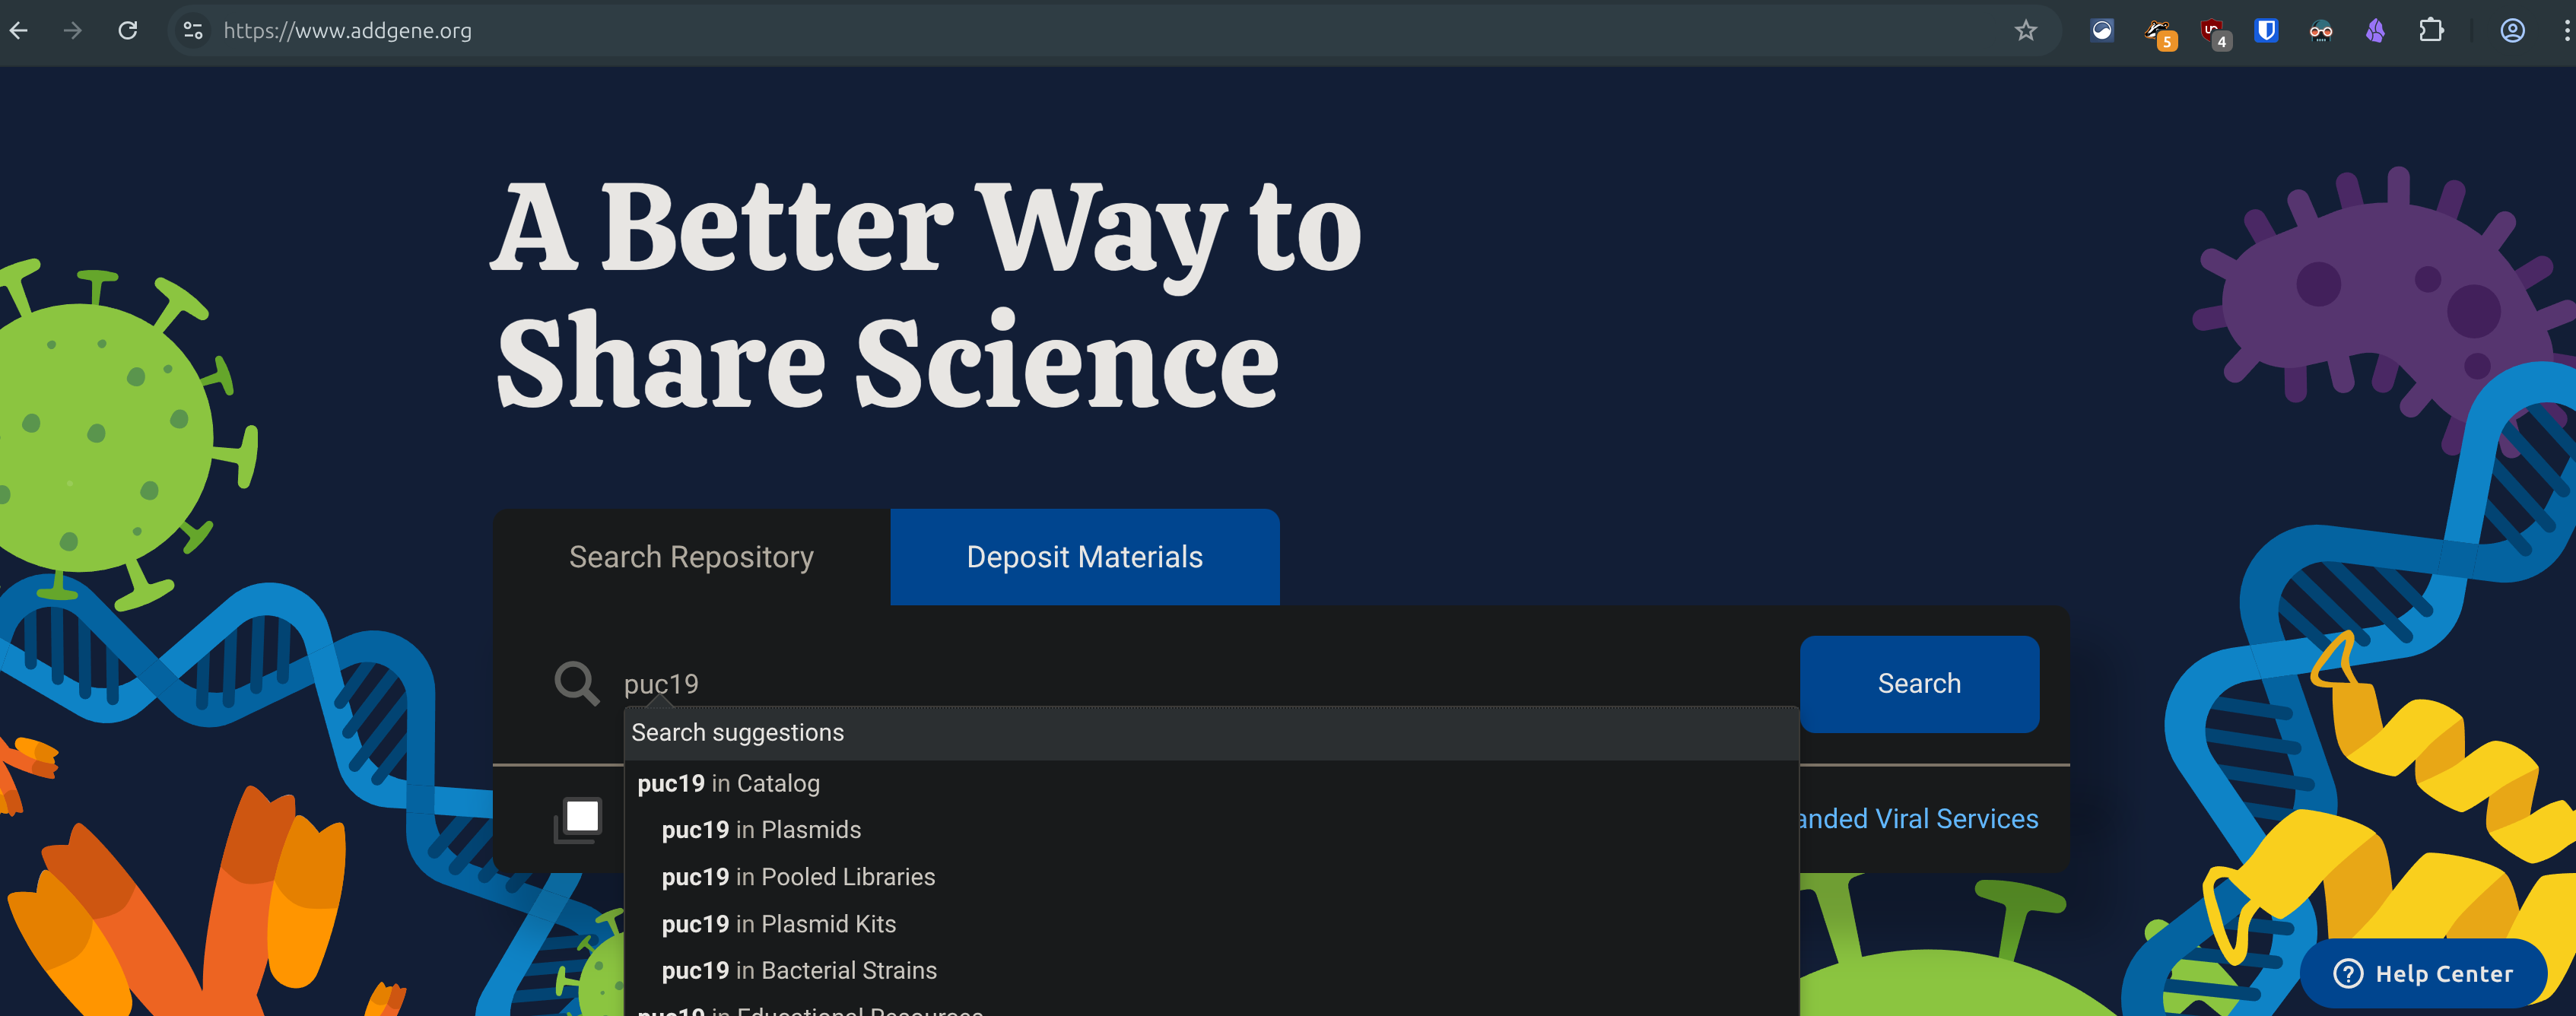
Go to geneadd.org and search for a common plasmid like pUC19, click on the first one you find, and copy the link in your address bar. Return to the benchling tab and paste the link in.

In the plasmid tab, click the scissors icon, and search up a common restriction enzyme that cuts in one place, like EcoRI. In the same coding region (colored block), look for a different restriction enzyme that cuts in one place that is not the same place as the first enzyme. You can see that ACC651 and EcoRI are highlighted in green and brown. These are the enzymes we will use.
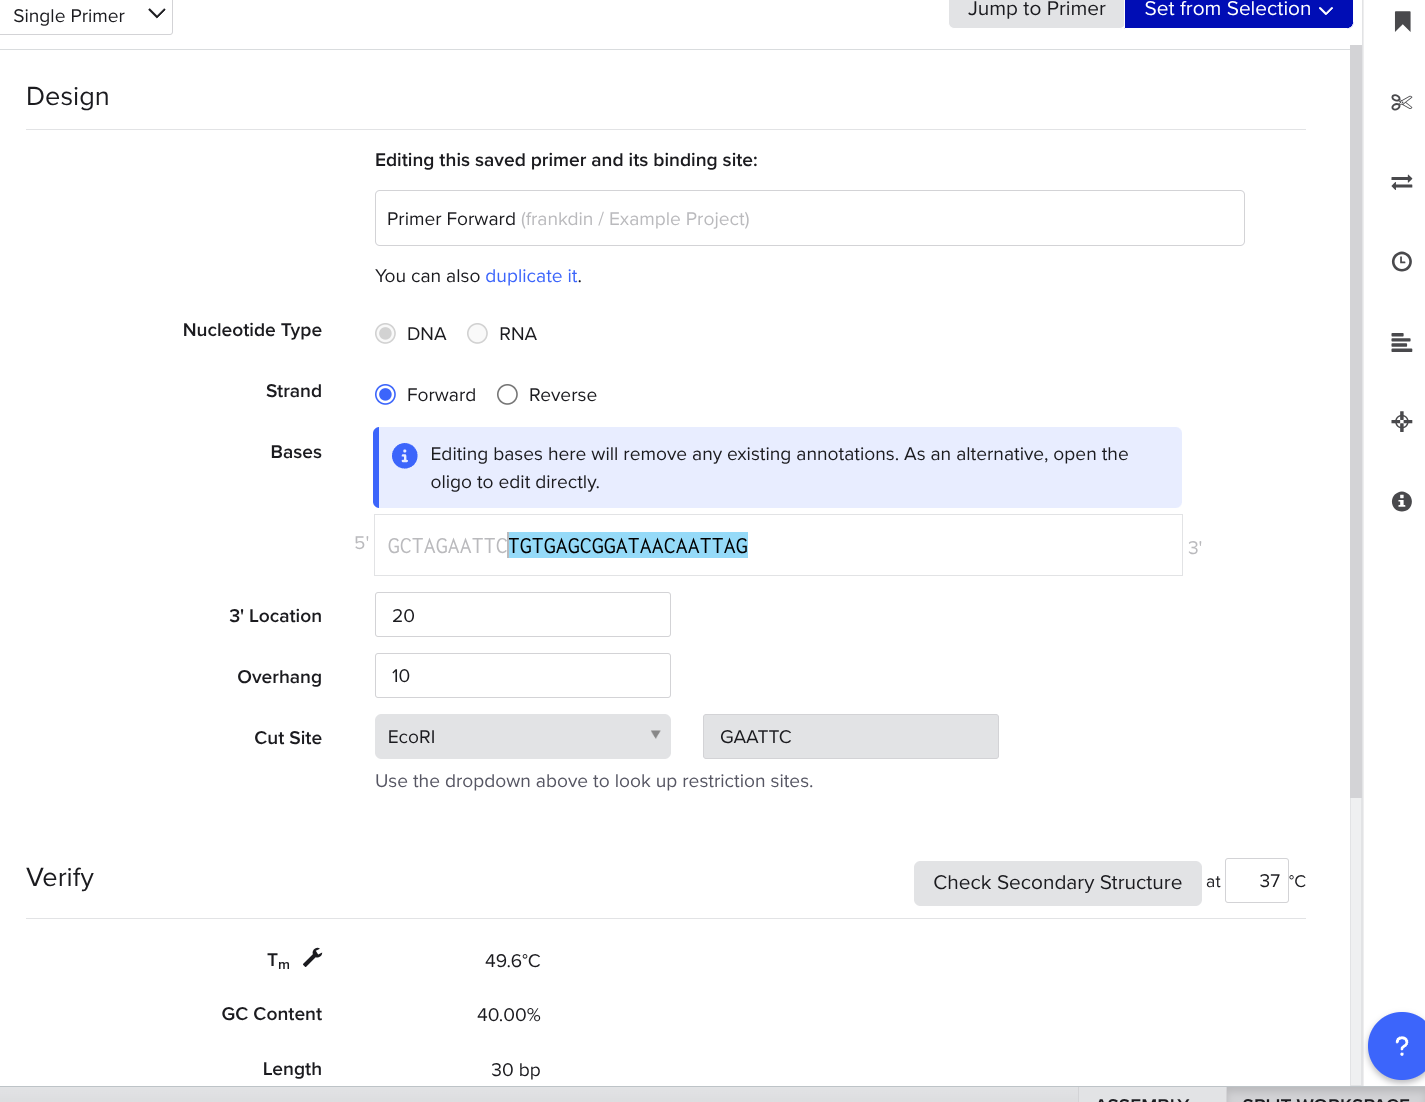
Primer Forward
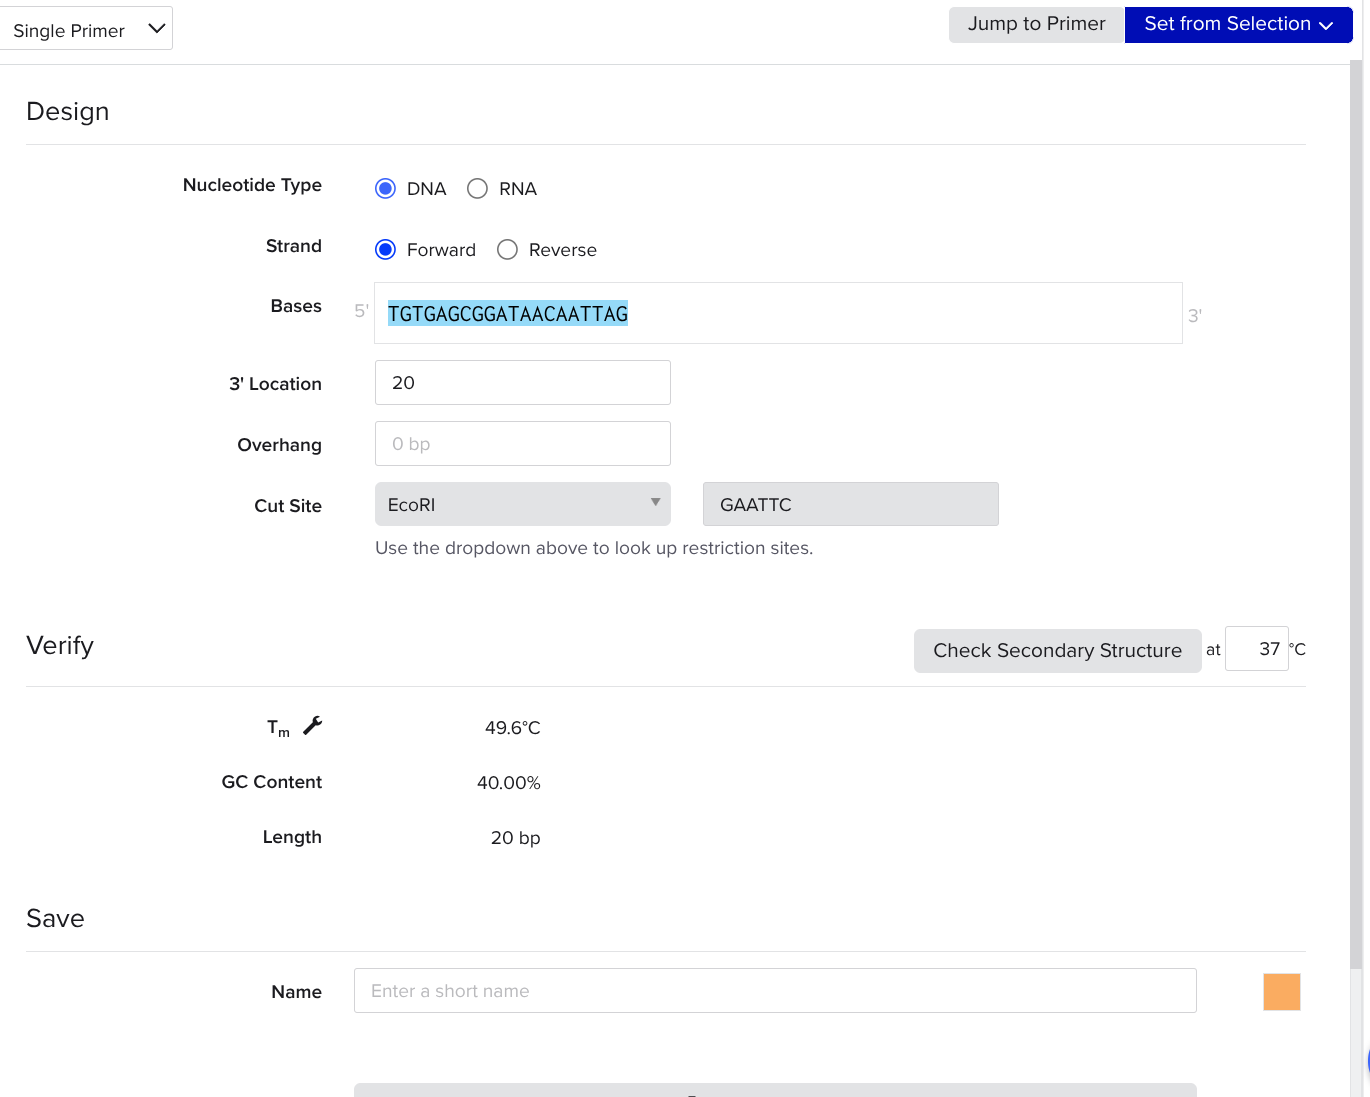
Open or switch back to the tab with our pasted gene in it. Highlight the first 18 to 22 nucleotides. Click create → primer → forward
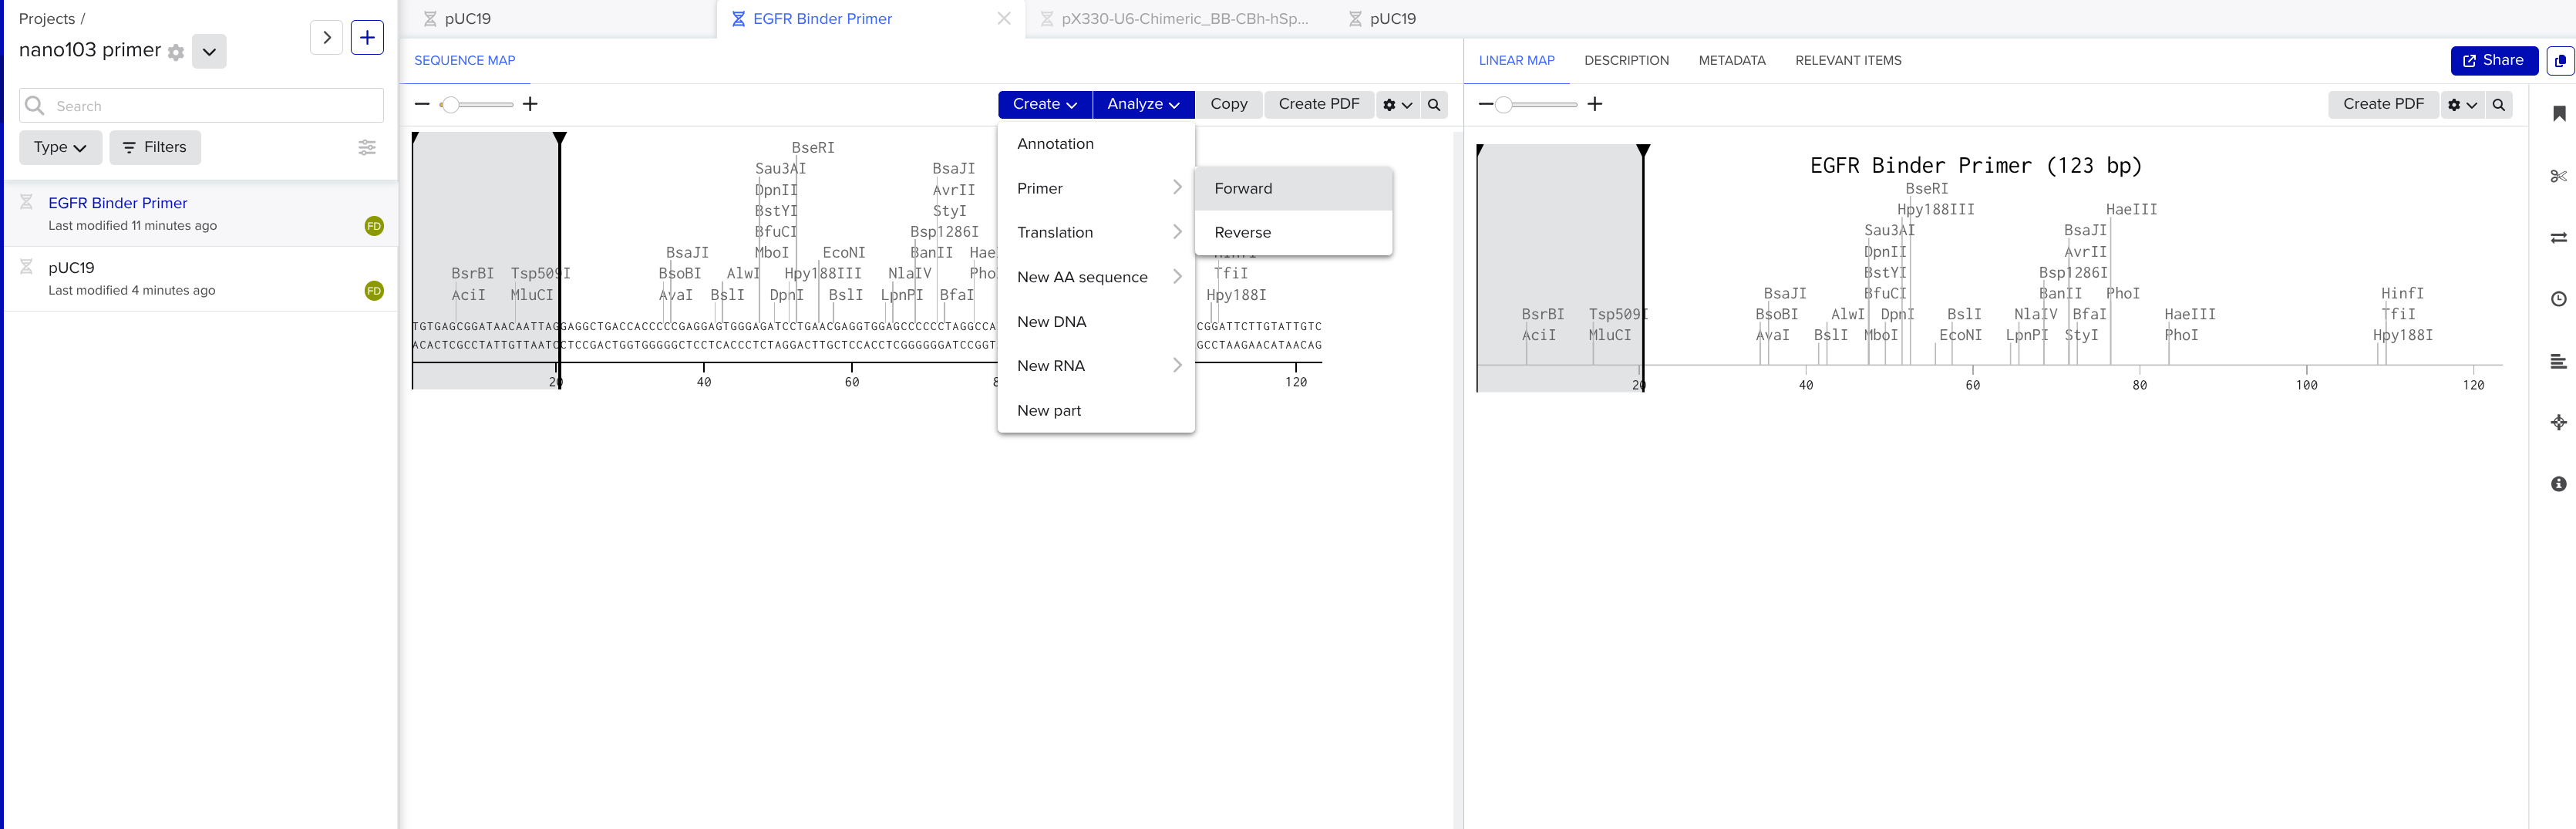
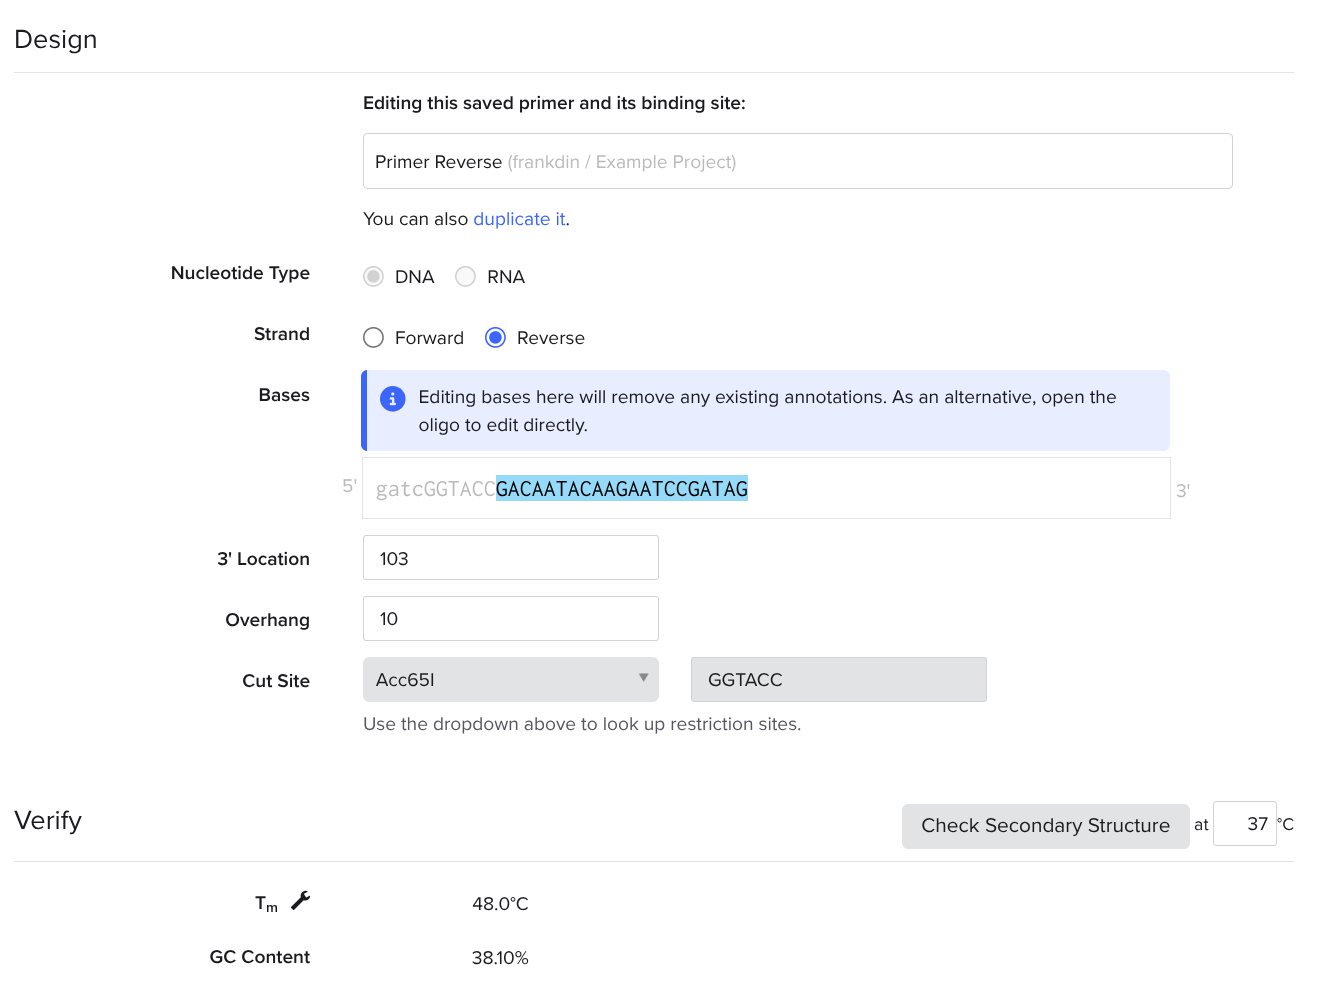
Primer Reverse
Highlight the last 18 to 22 nucleotides. Click create → primer → reverse
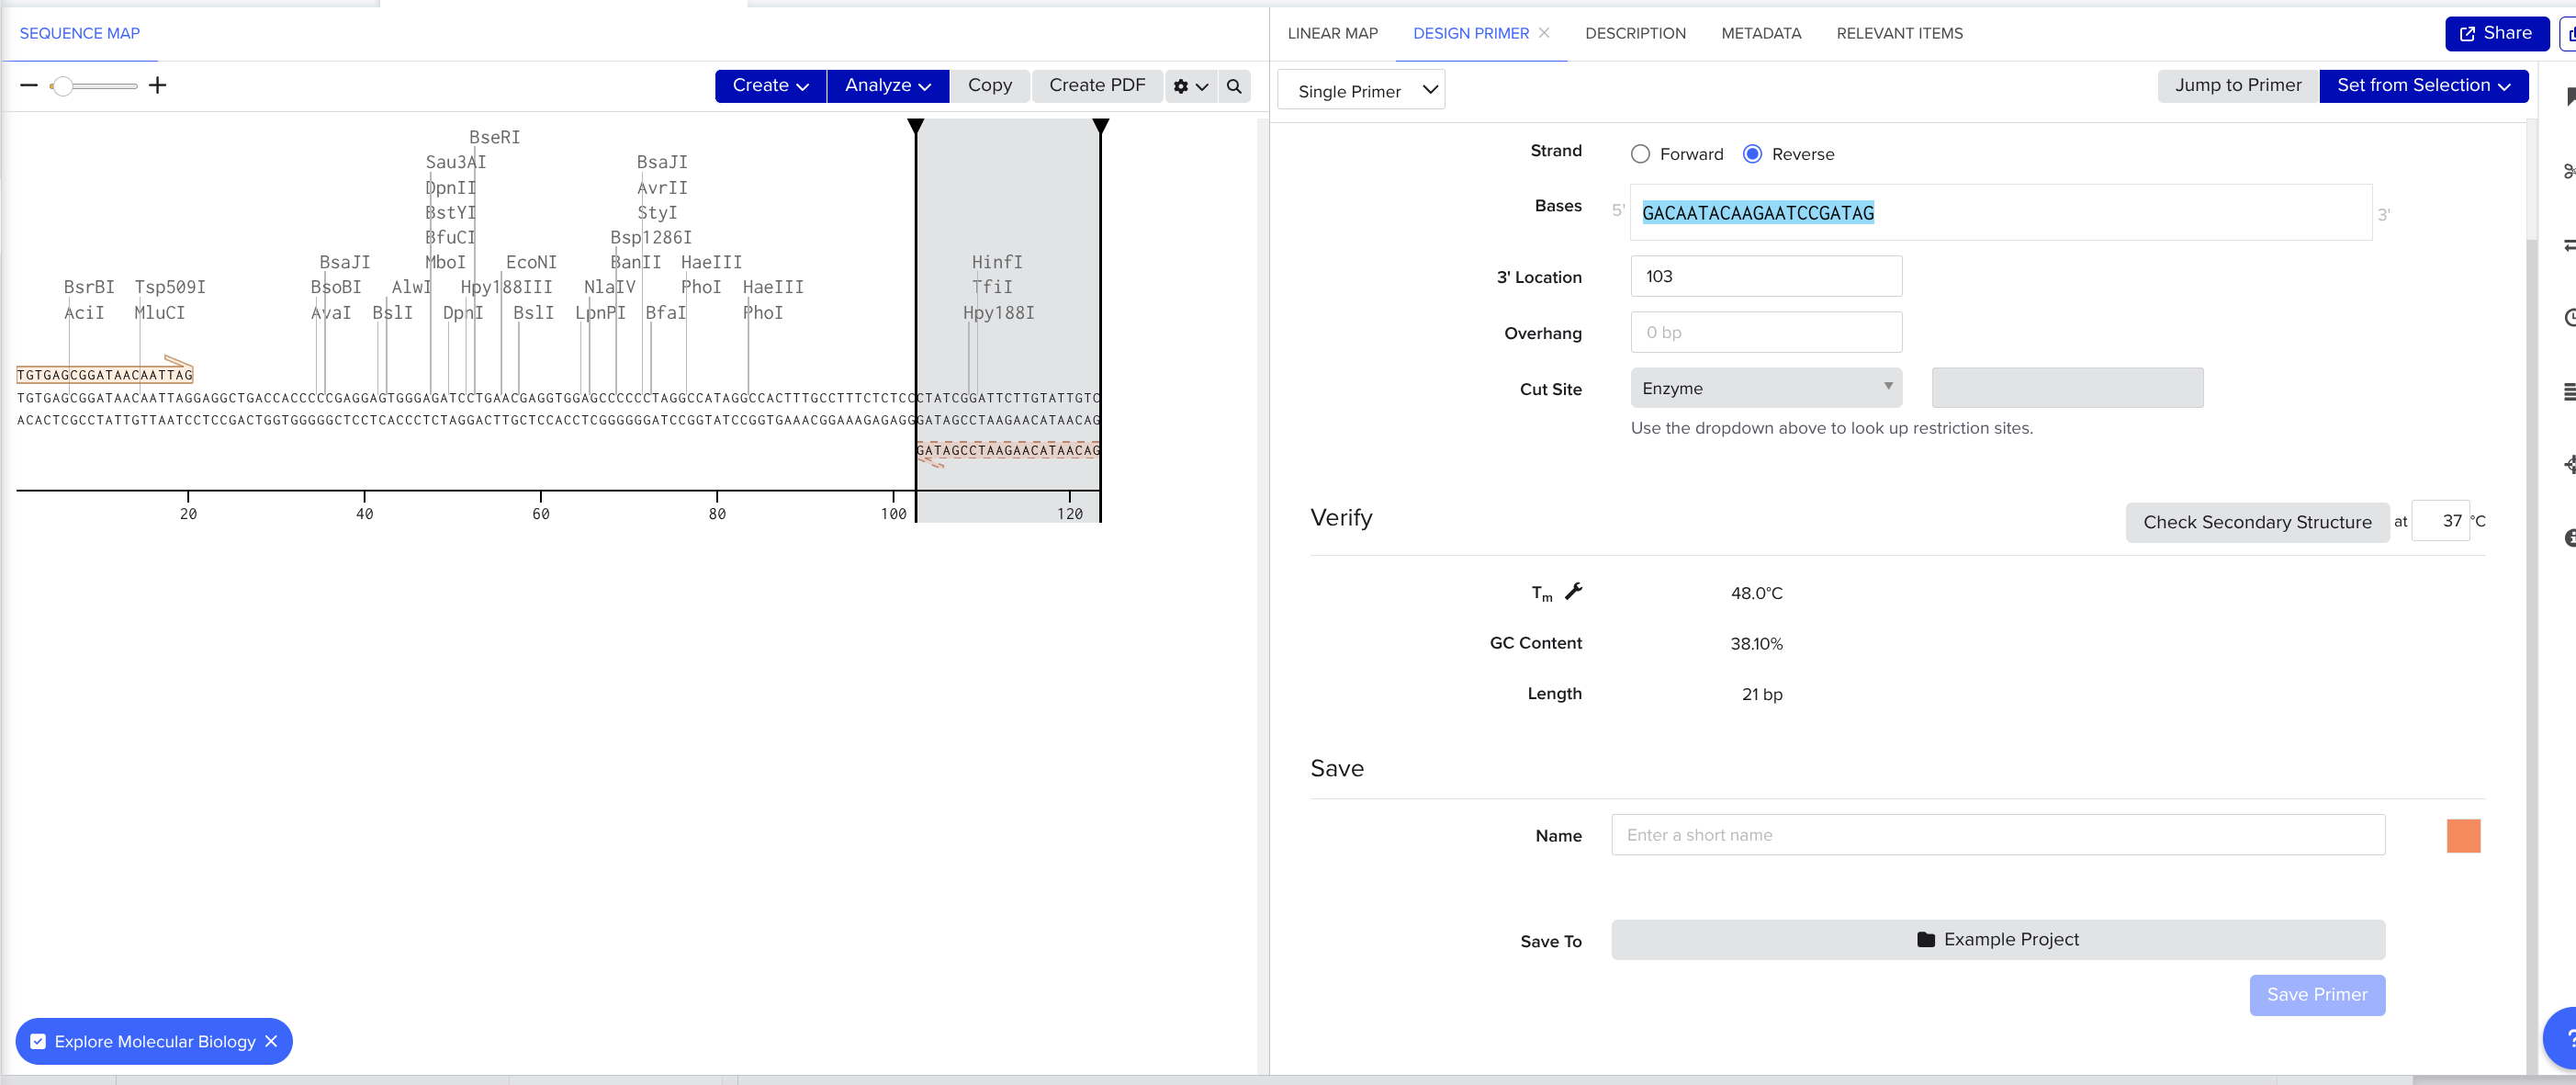
- Make sure to save the primers and give them a name (bottom right, scroll down)
Prepend Restriction Enzyme Nucleotides in Your Reverse Primer
Click the double arrows on the right side, select your primer, and click the edit button
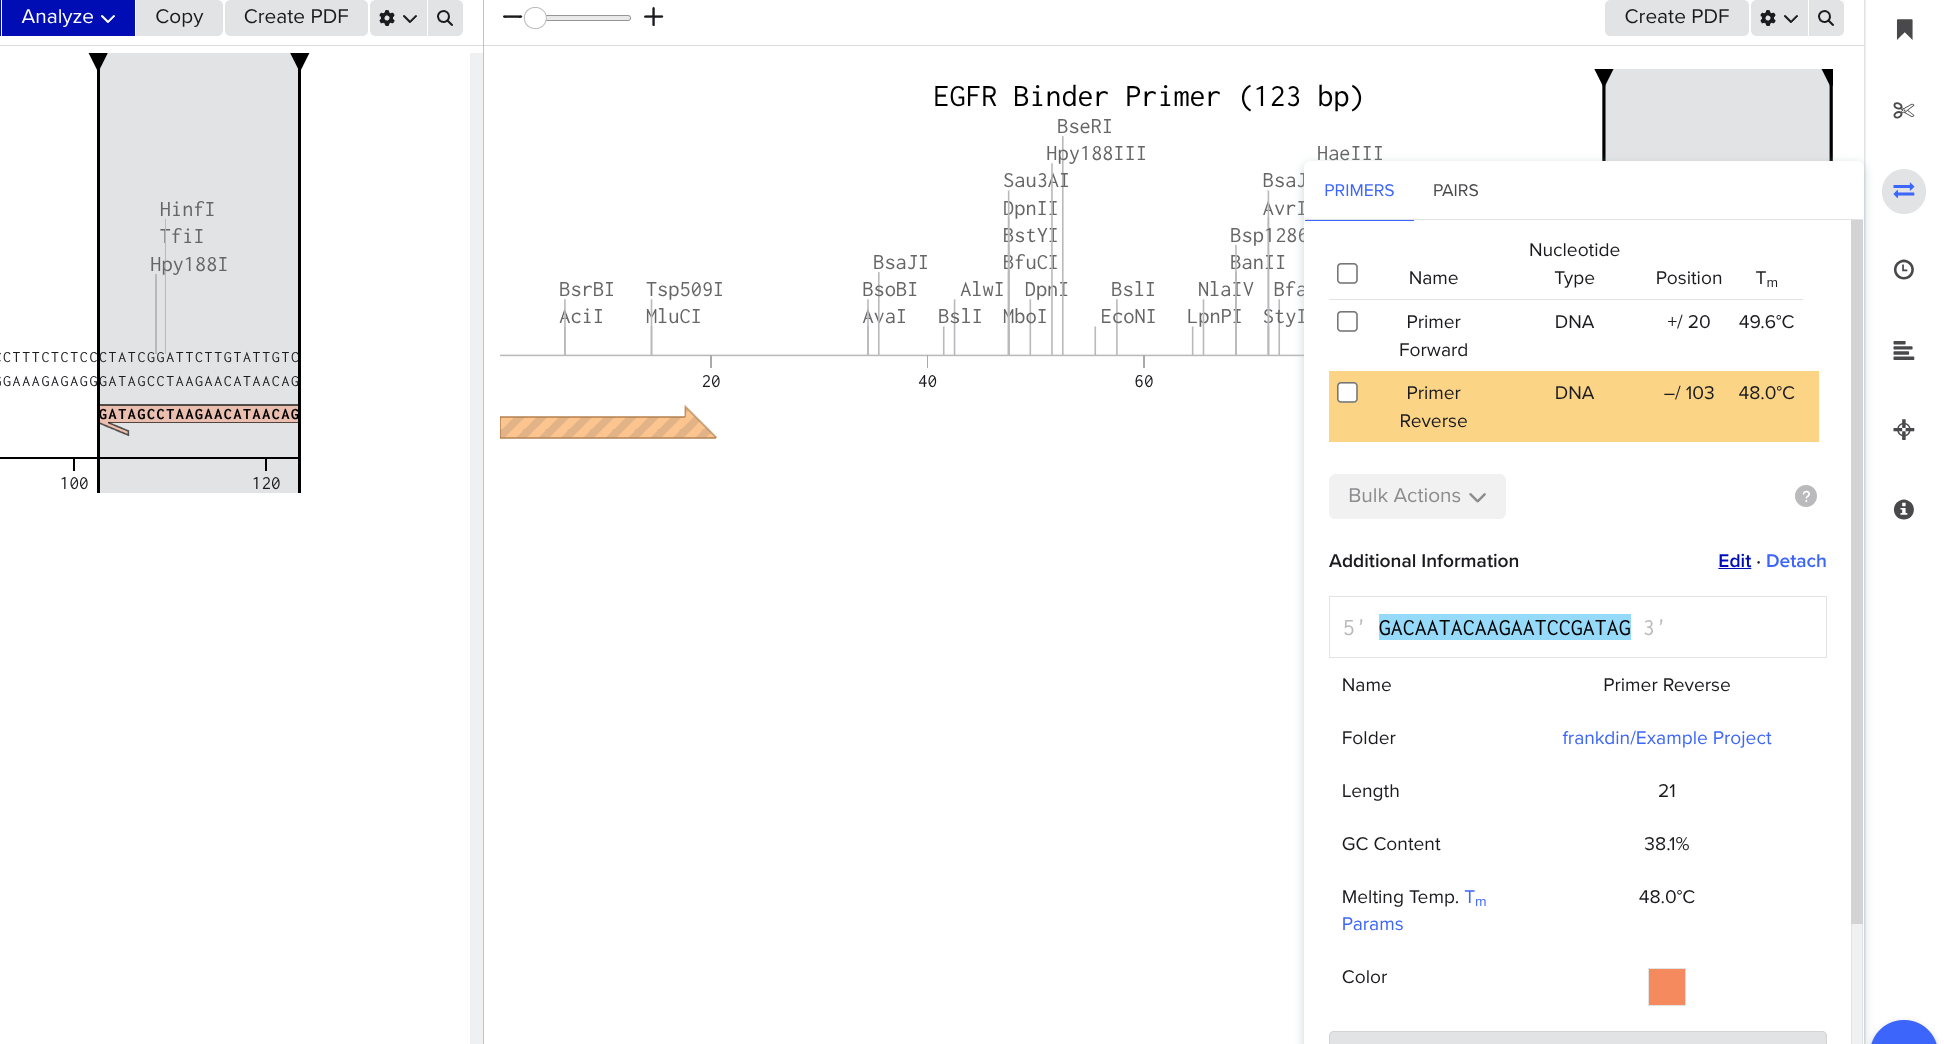
Look up one of the enzymes you chose using the shadowed search bar, set an overhang of 10, add 4 reasonable burner nucleotides to the beginning of your sequence, copy and paste the six nucleotide restriction site after the 4 nucleotides.
Append Restriction Enzyme Nucleotides in Your Forward Primer
Look up the other enzyme you chose using the shadowed search bar, set an overhang of 10, add 4 reasonable burner nucleotides to the beginning of your sequence, copy and paste the six nucleotide restriction site after the 4 nucleotides.
Congratulations, you have finished everything you need to do on the computer. Now, it is time for the experimental procedure. Purchase the plasmid, the primers, the gene, and then perform PCR and insertion into the plasmid.
PCR Setup Necessary Ingredients:
- 1 uL Template DNA (10–100 ng)
- 1 uL Forward primer (10 µM)
- 1 uL Reverse primer (10 µM)
- 0.5 uL dNTP mix (10 mM each)
- 5 uL 5x High-Fidelity PCR Buffer
- 0.25 uL High-fidelity DNA Polymerase
- 16.25 uL Nuclease-free water
PCR Cycling Steps
- Heat to 98C for 30 seconds (deconglomerate DNA)
- Heat at 98C for 10 seconds (separate dsDNA to ssDNA)
- Cool to 60C for 20 seconds (enable primer binding)
- Heat to 72C for 30 seconds (polymerase bind and extend primers)
- Heat to 72C for 5 minutes (ensure all strands are completed)
- Repeat steps 2 through 5 as many times as required.
- Cool to 5C for retrieval.
- Check the product size using gel electrophoresis.
- If satisfactory, purify the PCR product with a purification kit.
Restriction Enzyme Digestion Required Ingredients:
- 1 ug of DNA plasmid
- 2 uL of 10x Buffer
- 1 uL of Enzyme 1 (EcoRI in our case)
- 1 uL of Enzyme 2 (ACC651 in our case)
- 20 uL of Water
- Incubate this mixture for 1 hour at 36C
Ligation Ingredients Required:
- 50ng of Plasmid DNA
- 150ng of Insert DNA (from PCR)
- 1 uL of 10x Ligase buffer
- 1 uL of T4 Ligase
- Incubate for 12 hours at 5C
Gene Uptake
- Cultivate a plate of E. coli.
- Add 5 uL of ligation to 50 uL of cells.
- Chill the agar plate for 30 minutes on ice.
- Heat shock the plate at 44C for 30 seconds.
- Chill the agar plate on ice for 2 minutes.
- Add 250 uL of SOC medium
- Put the mixture in a shaker for 1 hour.
Cultivation and Selection
- Plate 50 uL of processed E. coli cells on to an agar plate with ampicillin.
- Incubate for 12 hours at 37C